AtomML™ How To#
AtomML™ is MCU specific and therefore is formatted to specific MCU boards. Each MCU board will have its own How to; we will explain how to install AtomML™ on the STWIN in this How to.
Register Profile on Launchpad#
To start monitoring devices on your MCU device, you must first register it on MicroAI Launchpad. This is where you will set up your device profile and configure the settings you need to perfectly tune your AI model for the project at hand.
Log into your Launchpad account. You should have already set up an account in the “Getting Started” portion of this documentation. If you have not set up a Launchpad account, please go do so.
After logging in, you can add a profile directly from the Launchpad home page. In the bottom right, you will see a button that says “ADD PROFILE”, clicking on this button will open up a page to add your device profile.
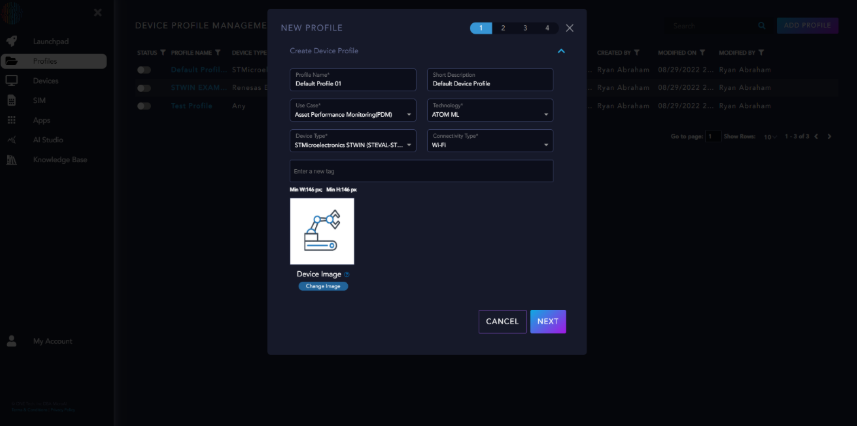
On the first page of creating a device profile, you will first put in a profile name. This name can be whatever you want, but it is recommended to make it unique and easily recognizable.
Then choose your use case and technology, for the purposes of this tutorial, we recommend choosing Asset Performance Monitoring (APM) as the use case and ATOM ML+ as the technology. Then choose which MCU board you are using under “Device Type”.
Note
Some MCU boards use a Wi-Fi connection, and others use more specific connection types. Depending on which board you pick, the connectivity type will auto-update.
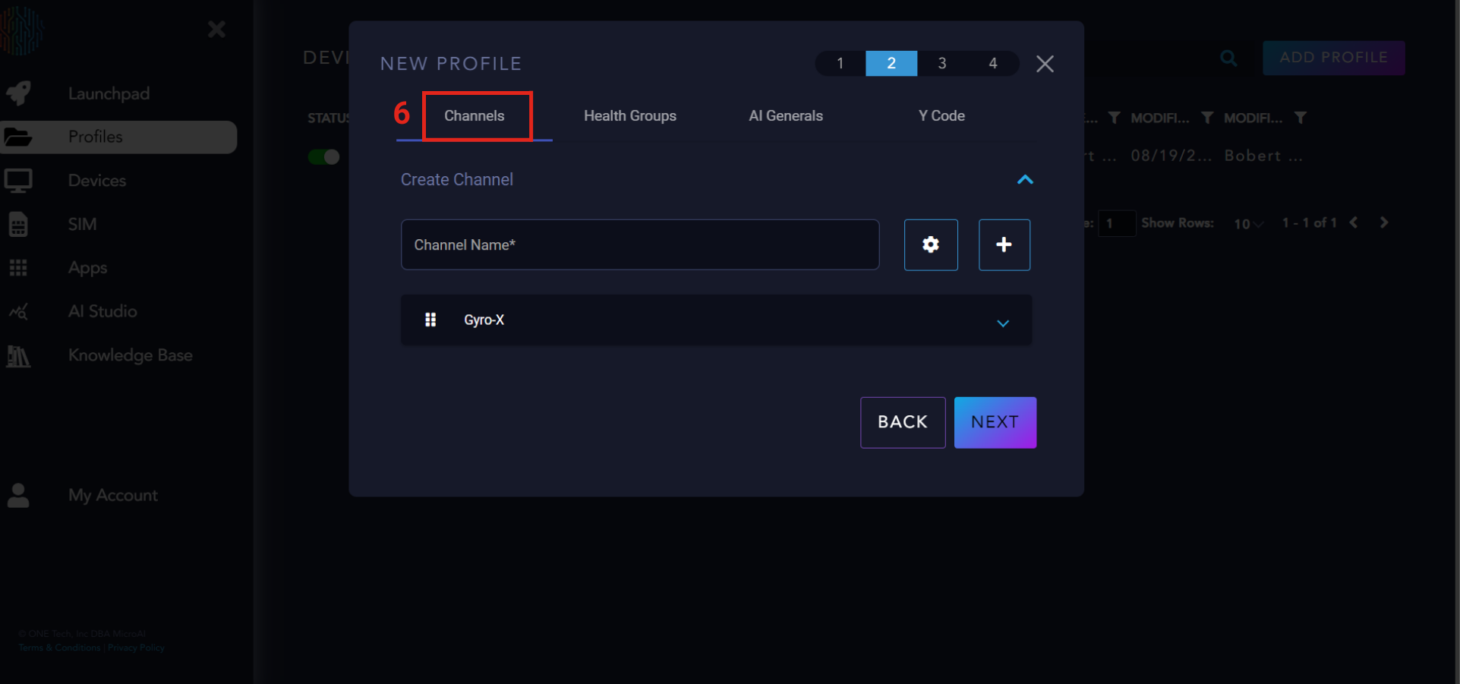
Next, you will click “NEXT” in the bottom right, and it will change to a new page. At the top of the page, you will see several headers titled “Channels”, “Health Groups”, “AI Generals”, and “Y Code”. These are the inputs needed to configure AtomML™+ to the custom parameters you want to train your MicroAI Model on.
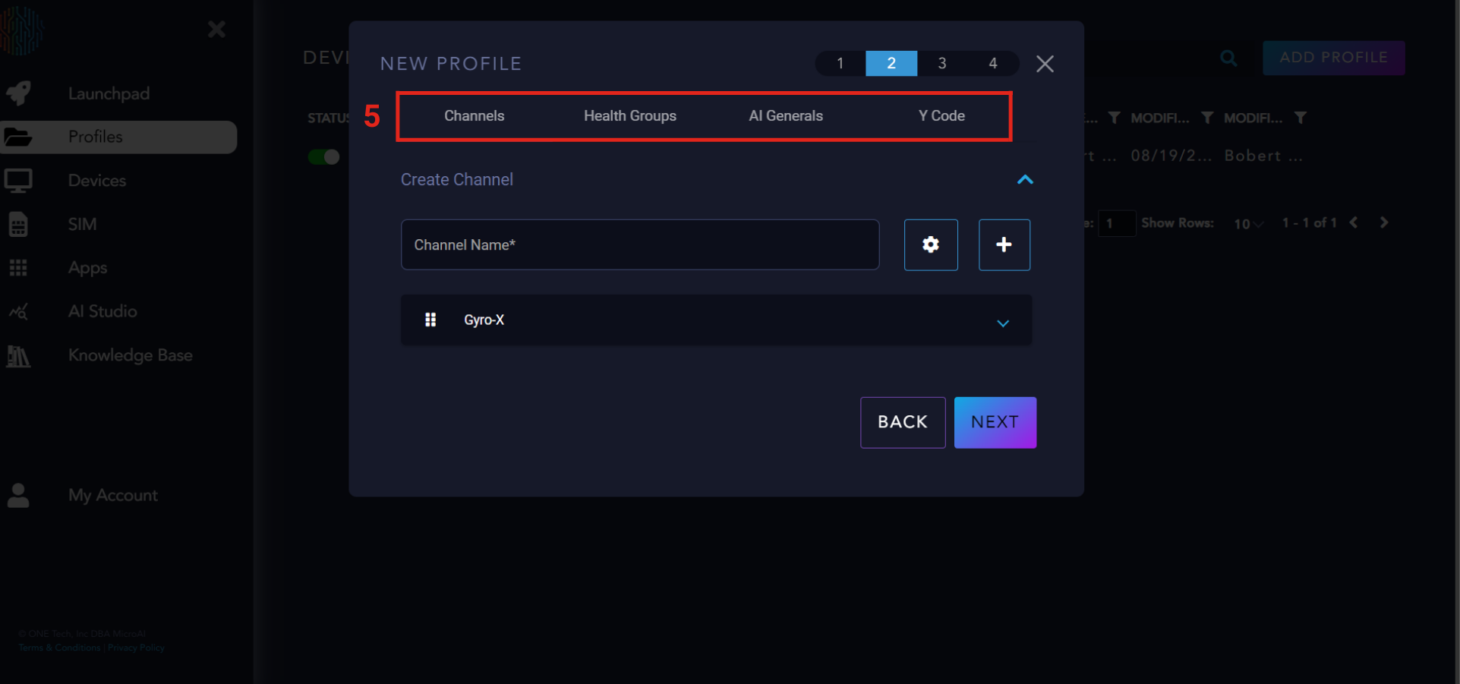
Let’s go over channels first. The channels are essentially the data sources. Once you have created a channel or multiple channels, there is a drop-down that allows for more descriptive tuning for each channel.
Channel Parameter Explanation#
The first box is the health group it is assigned to. For AtomML™ you can only have one health group.
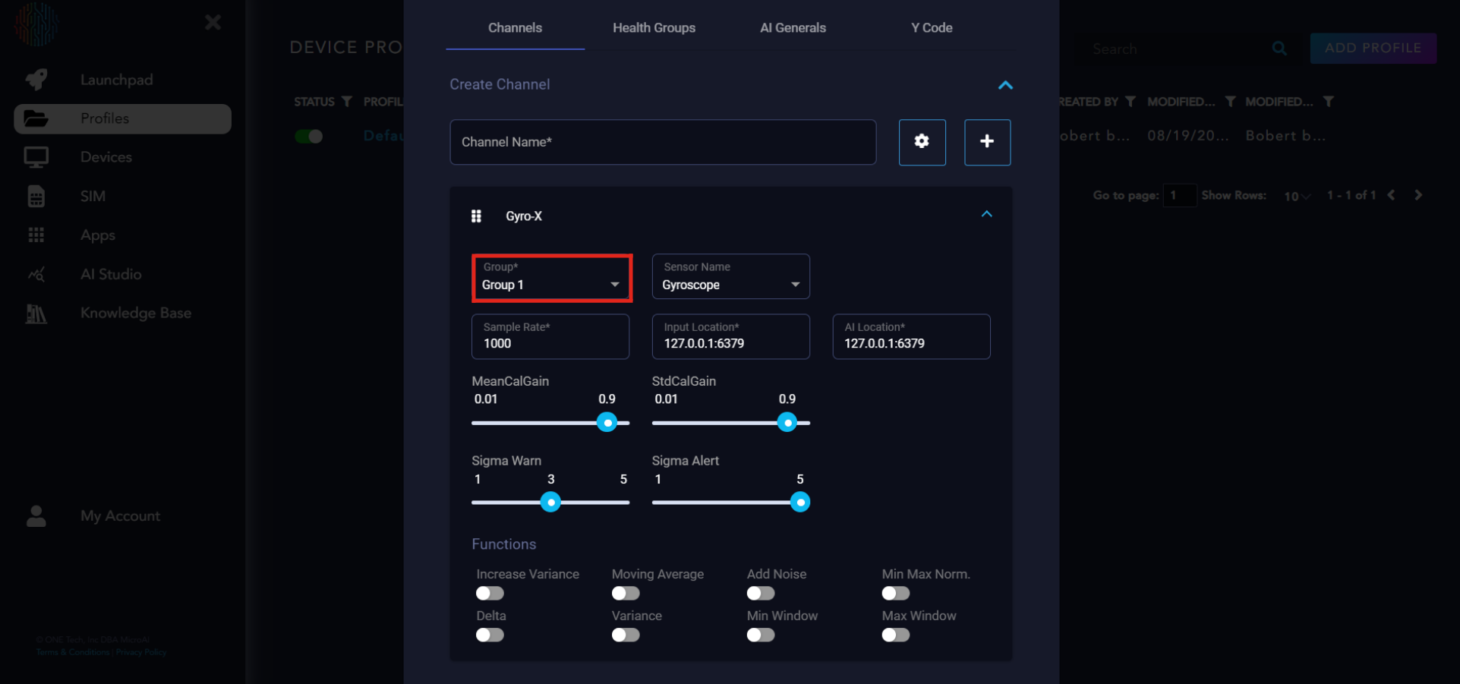
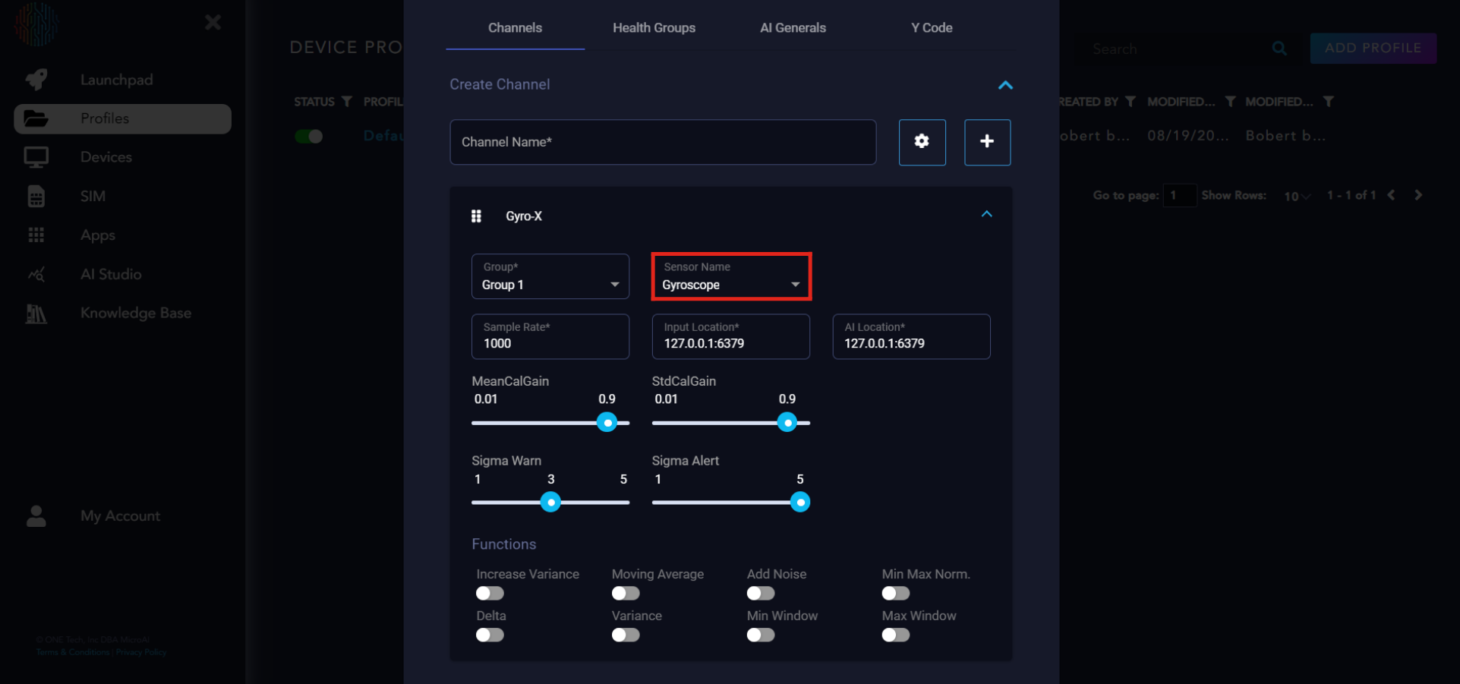
Next is the sensor name. This is the type of sensor the channel is. There are many preloaded sensor names, but if your sensor is not available, you can type it in the box and add it as a sensor.
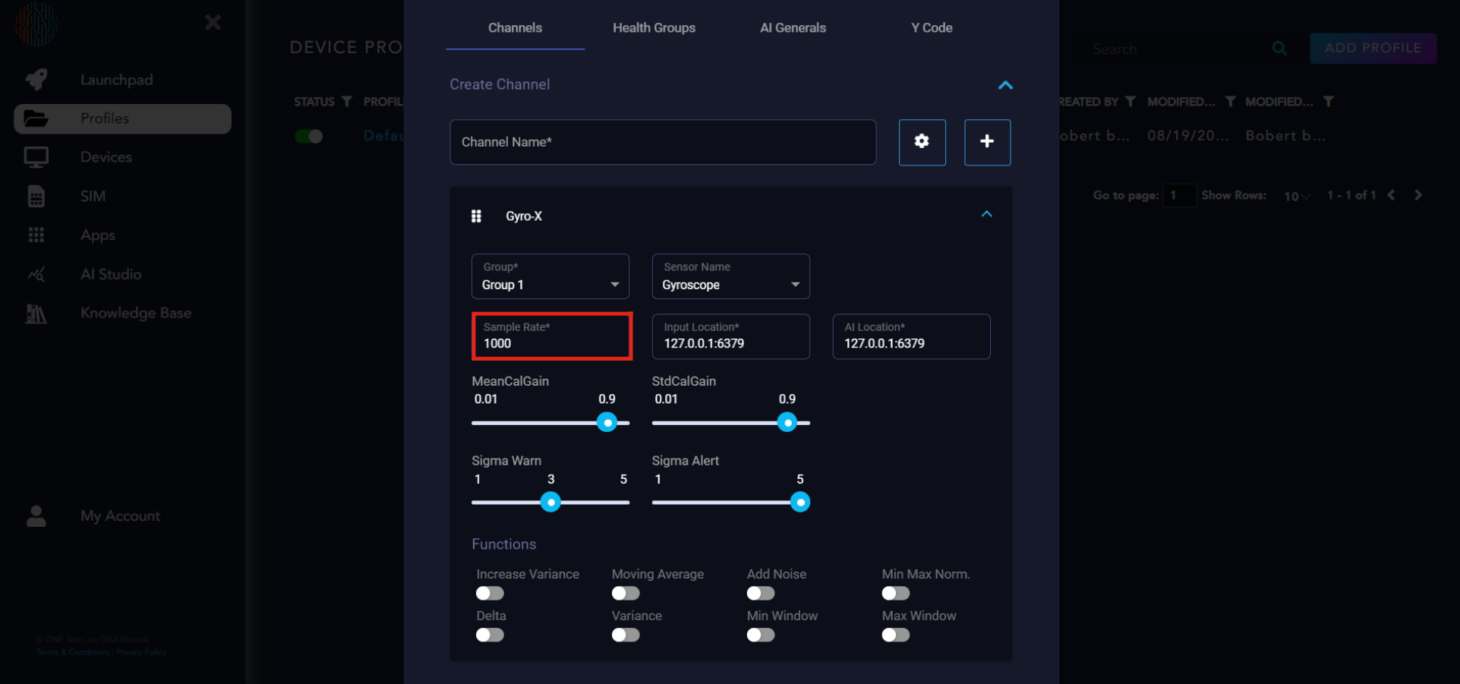
Next is the sample rate. This is how many samples are taken in one second. It takes the continuous data and discretizes it. The higher the sample rate, the more similar it will appear to the actual continuous data. Keep this in mind for low memory edge devices. For now, let’s keep it at 1000.
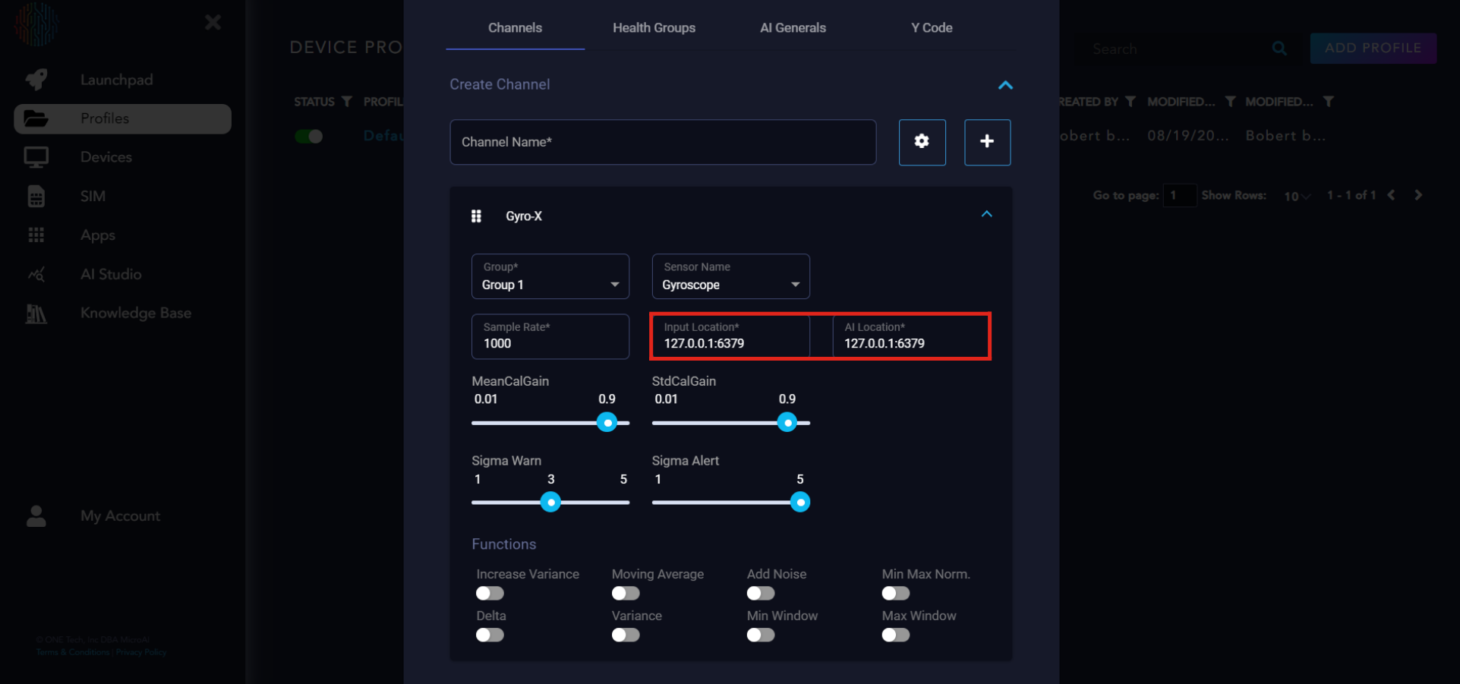
The next two boxes are simply the IP addresses of where you can input data and where the AI Location is. We do not need to change these for our purposes.
The sliders you see are parameters that can be tuned to affect bound calculations.
MeanCalGain - Filter coefficient to approximate mean. Higher values lead to more stable bound widths.
StdCalGain - Filter coefficient to approximate standard deviation. Lower values lead to more stable bound widths.
SigmaWarn - Number of standard deviations away to set the upper and lower bound from the one-step-ahead prediction. Used for abnormal classification.
SigmaAlert - Number of standard deviations away to set upper and lower thresholds for alert generation.

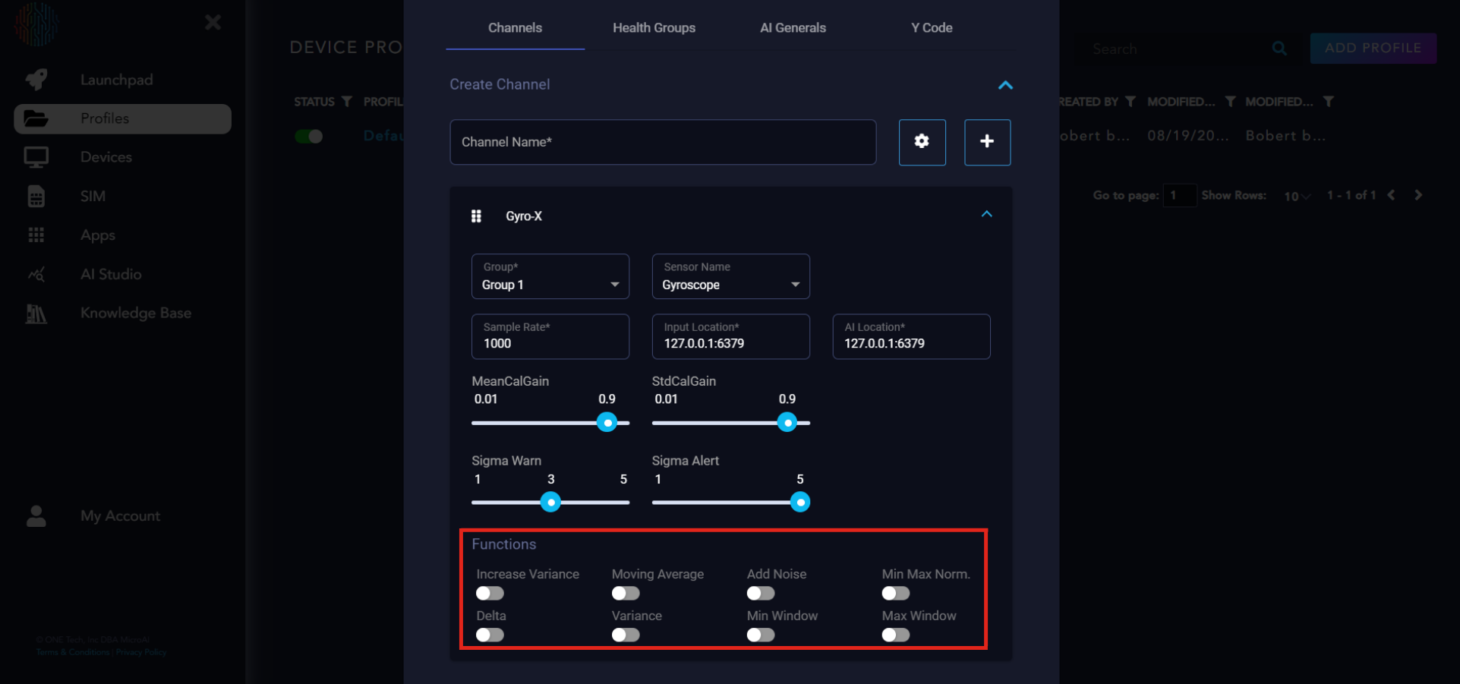
The buttons at the bottom are built-in feature engineering functions you can turn on or off at your discretion. We recommend starting off with no feature engineering and seeing the results and coming back to turn on the functions which will give you the results you want.
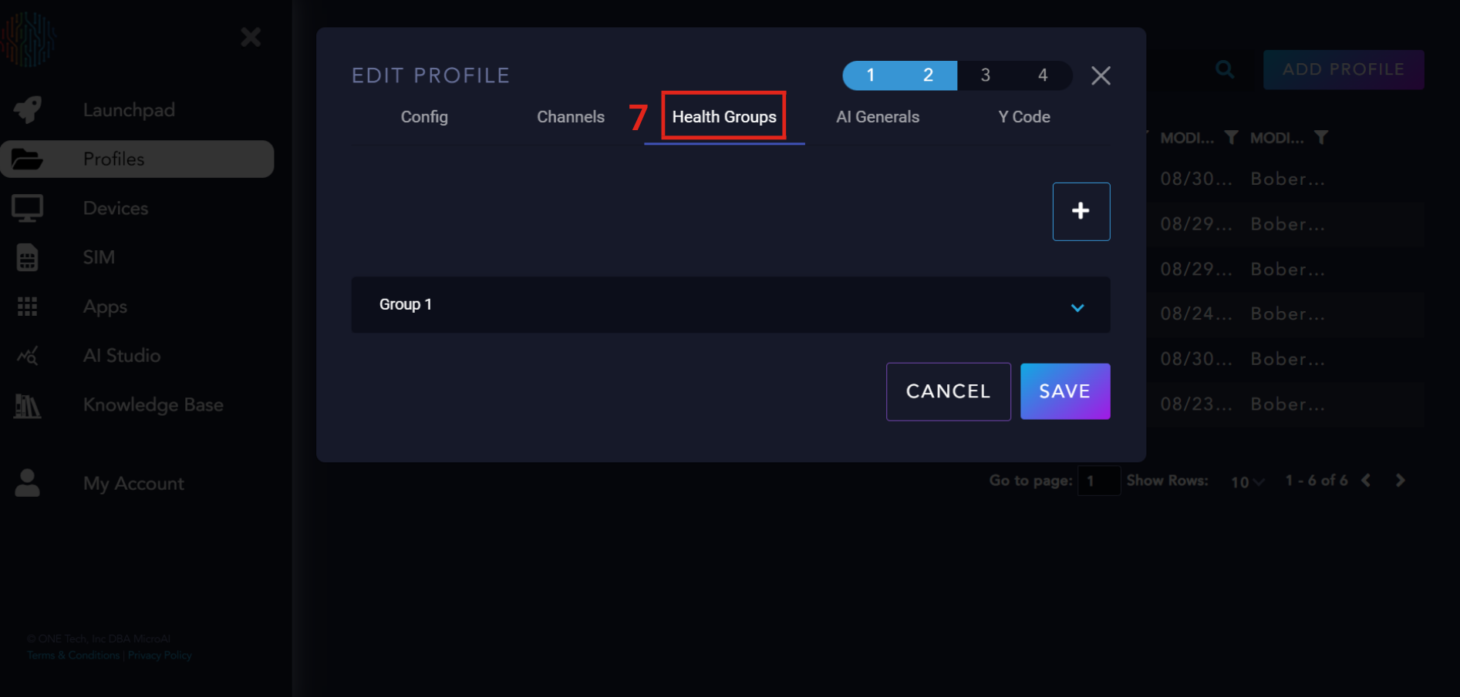
Health Group#
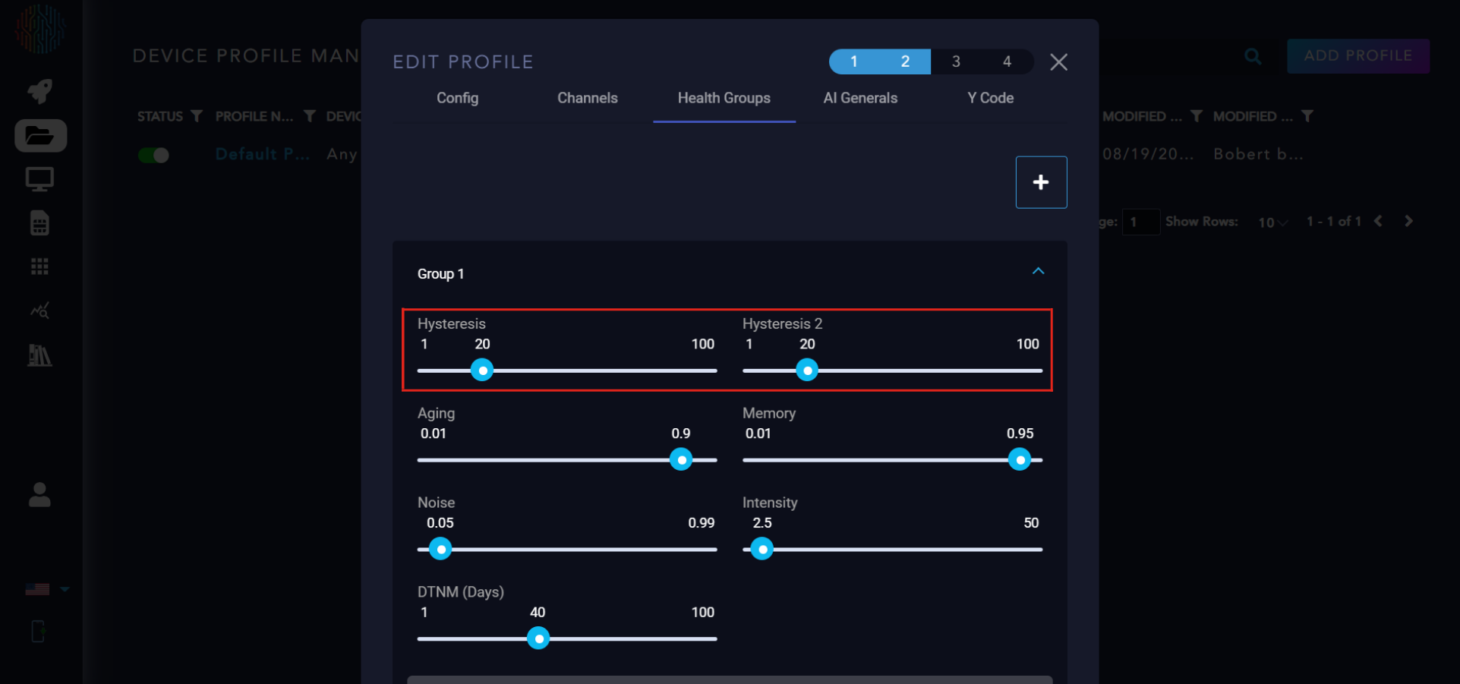
You can only have one Health Group at the MCU level. The health group controls the health score, which is displayed once a device has been registered and is sending data to Launchpad. Each of the sliders has specific meanings:
What is the Health Score?
The Health Score is a metric that reflects the likelihood of a machine failure. It combines the density, magnitude, and long-term effects of abnormalities.
Health Group Parameter Explanation
Hysteresis 1 and 2: These control the speed at which a health score increases—a higher value results in a slower increase. All values over 1 cause the health score to increase slower than it decreases.
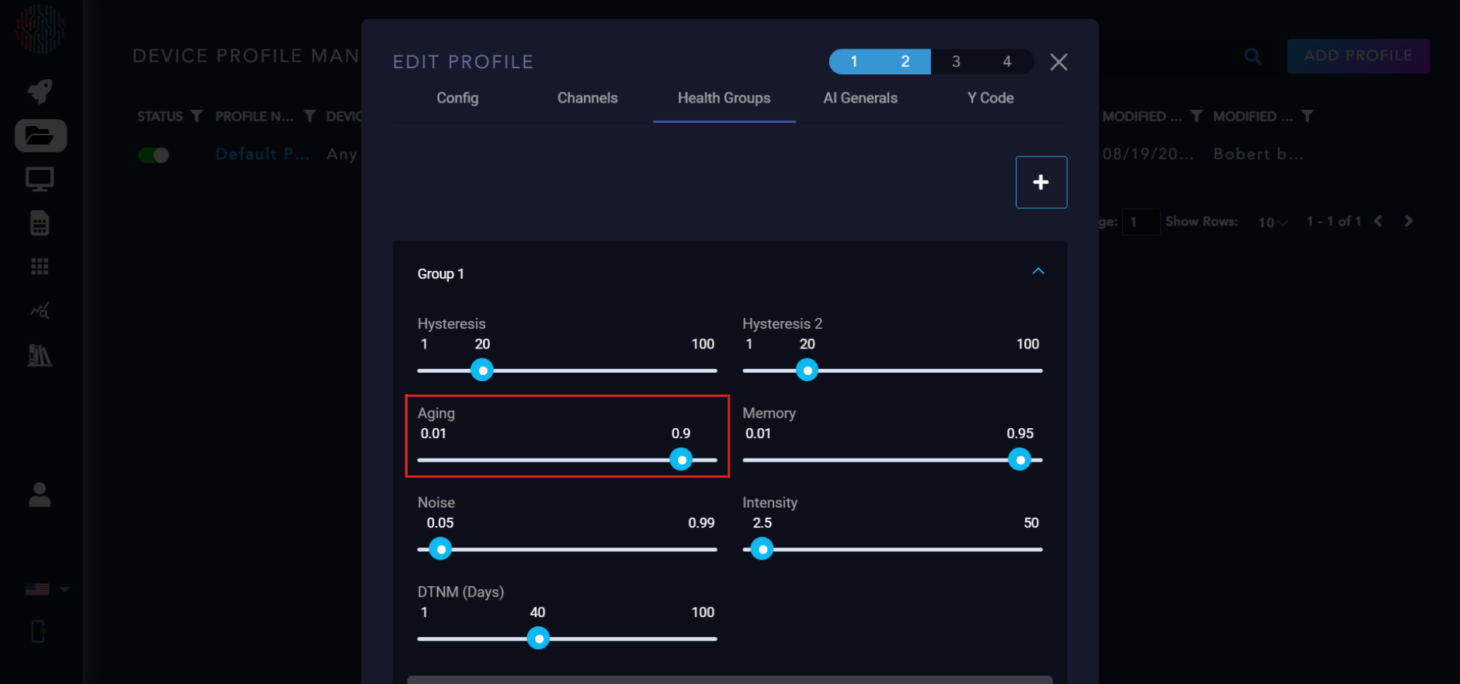
Aging: This controls the rate of change in the health score. A higher value results in a less rate of change.
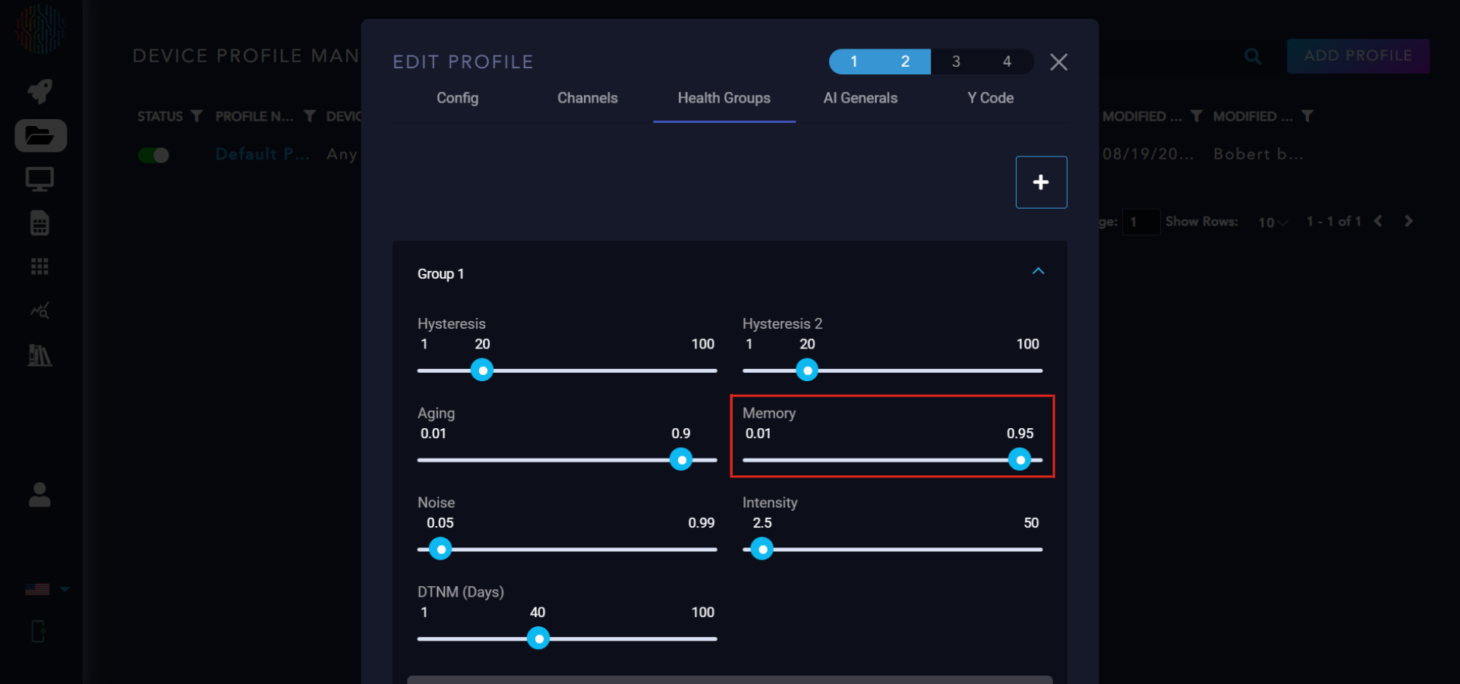
Memory: This is a coefficient to control how much previous data is remembered. The closer to one, the more data is considered.
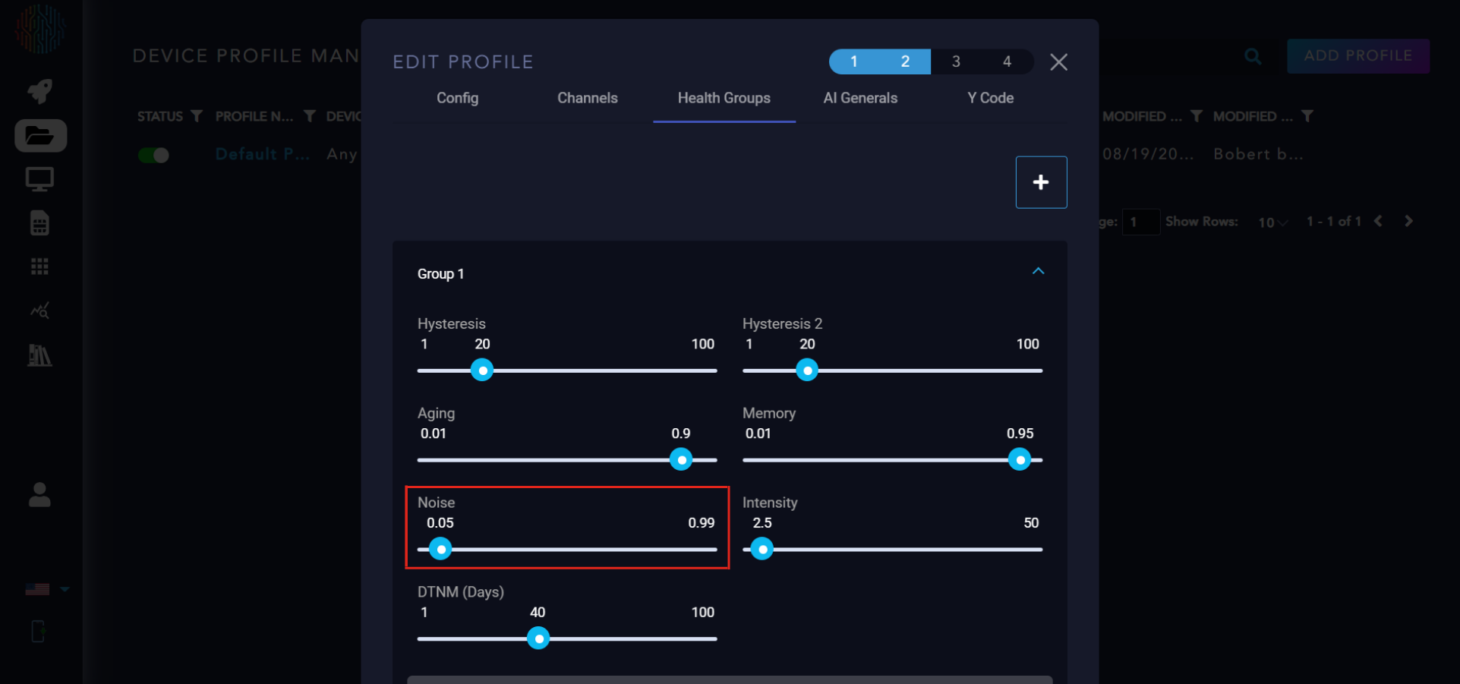
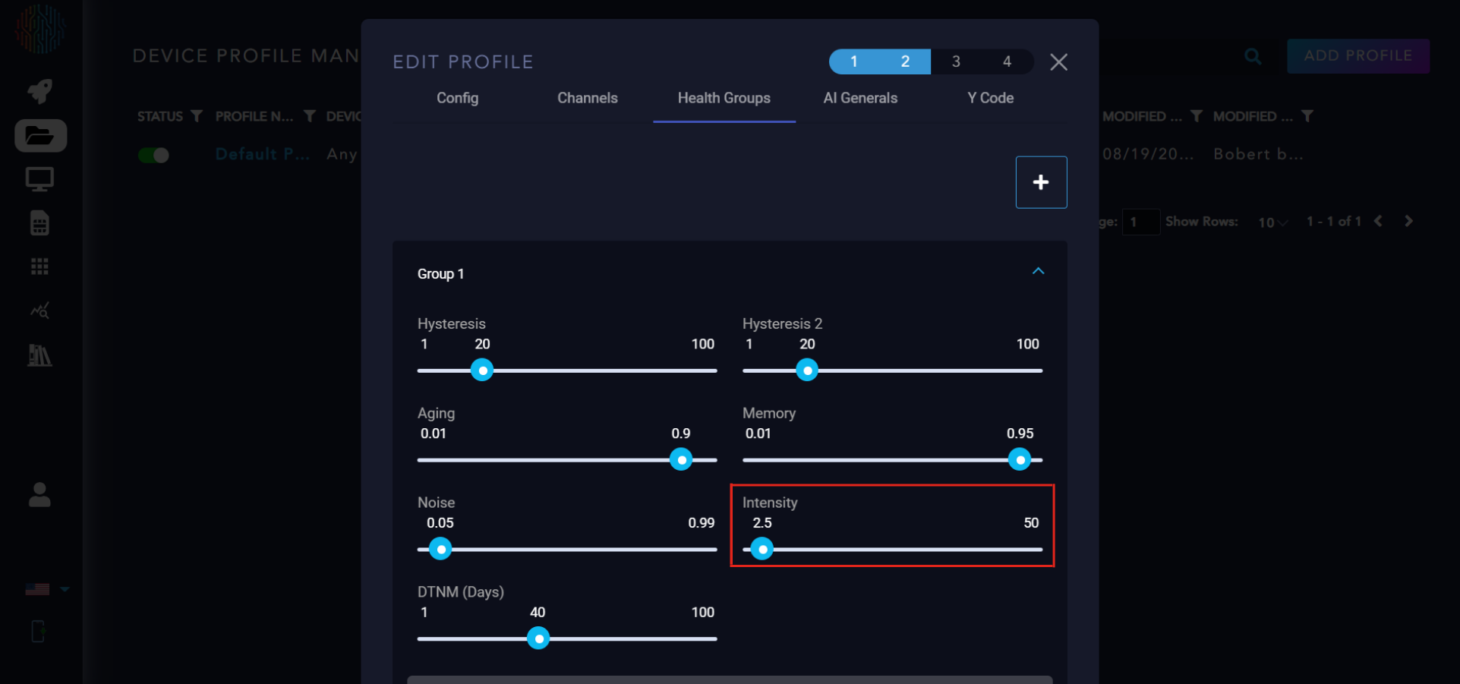
Noise: This determines the expected false positive rate. A higher value means more abnormal data is ignored.
Intensity: This coefficient controls the weight of abnormal channels that are far from the normal bounds. It should not be set higher than the number of total channels.
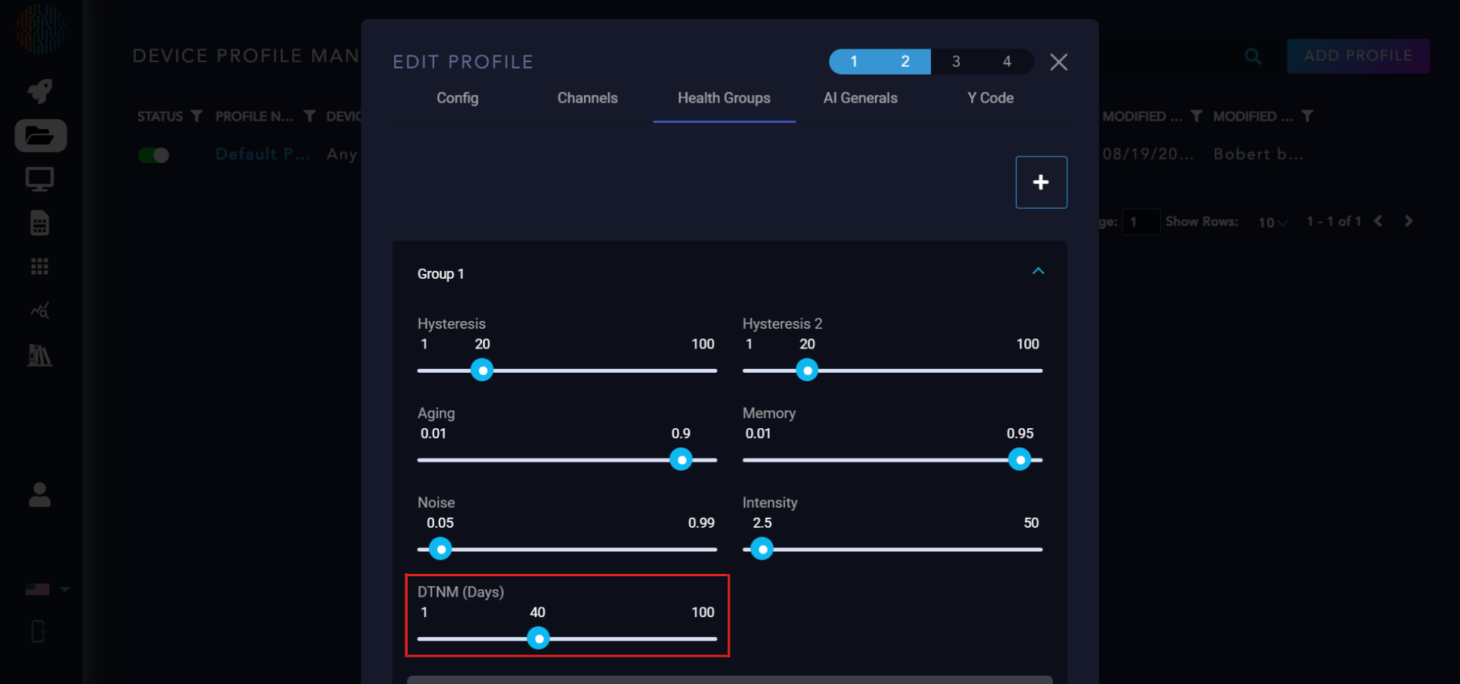
DTNM: Days to Maintenance is a scaled version of the health score to the nominal maintenance interval, subtracting the time that has passed since maintenance has occurred.
What is the Nominal Maintenance Interval (NMI)? The NMI is the length of the maintenance cycle of the monitored equipment, provided by the user.
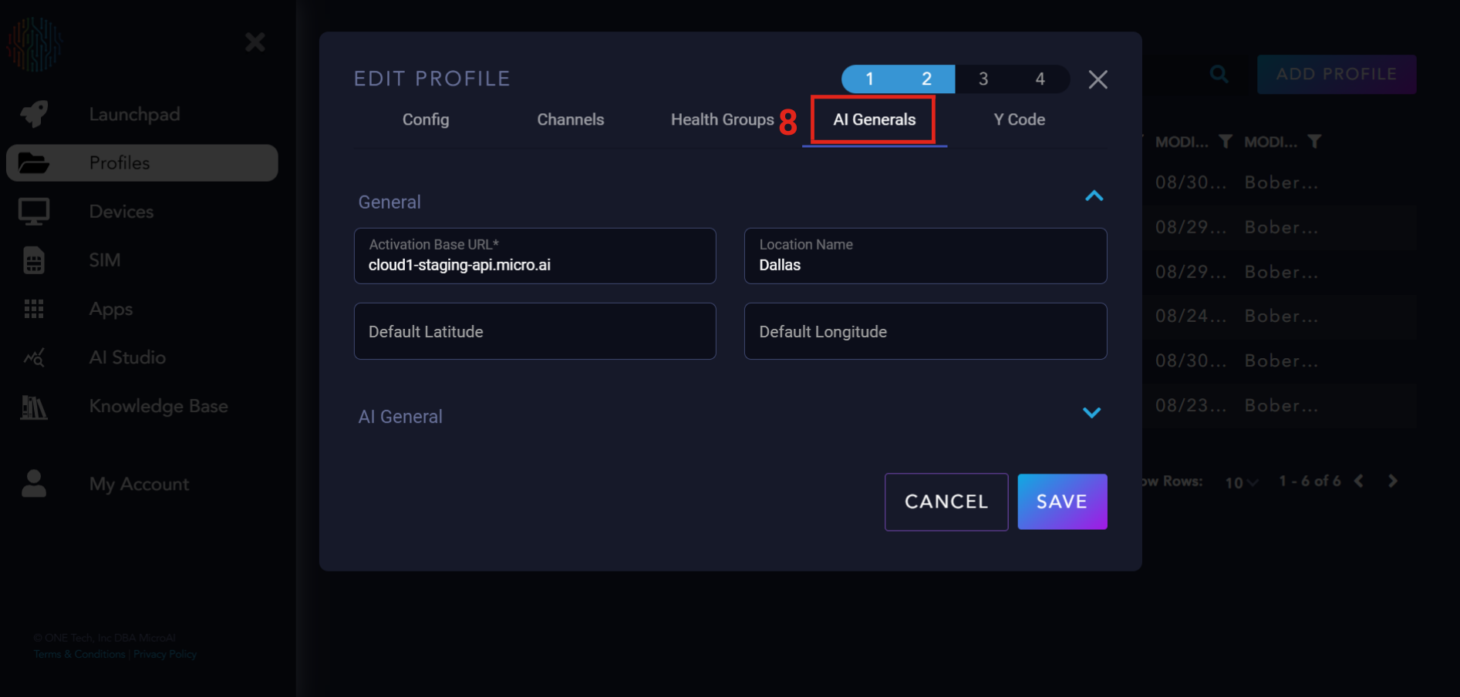
AI Generals#
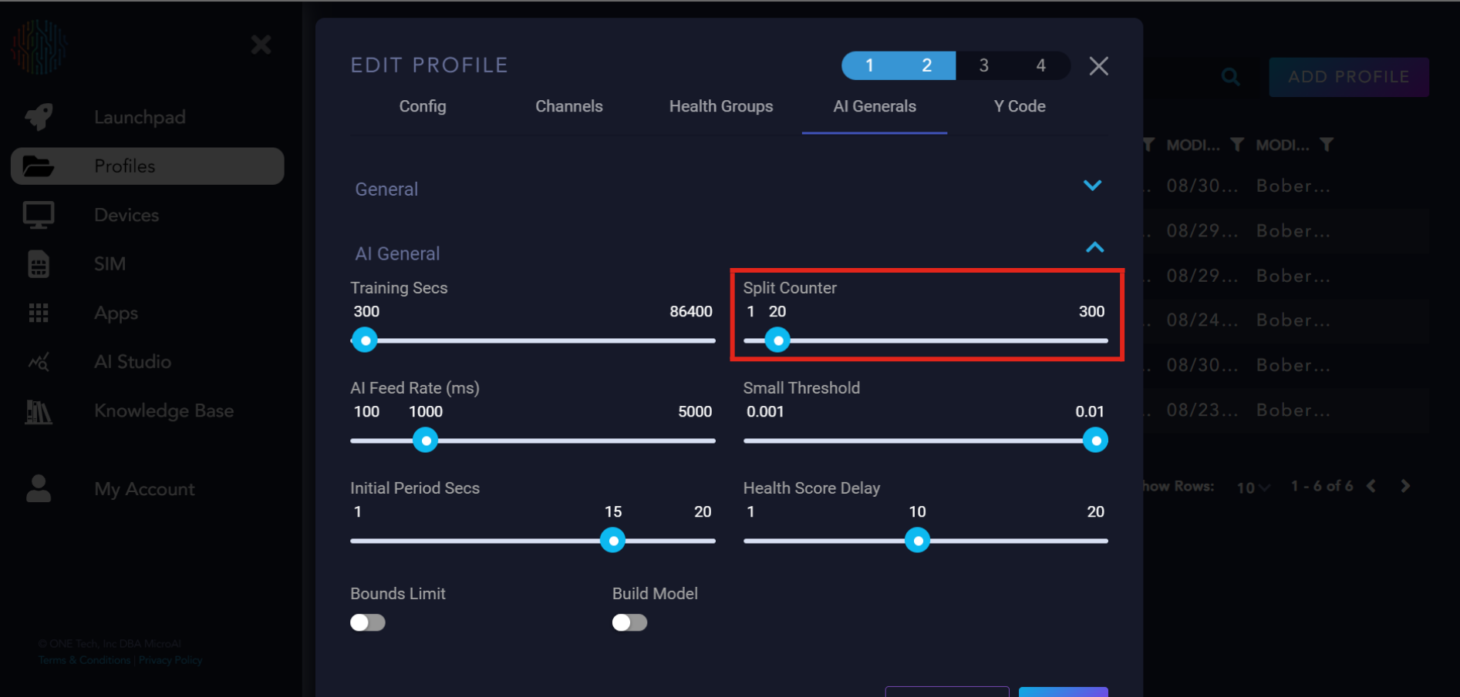
AI Generals is where you configure the parameters for building your AI model. Under “AI General” there are sliders used to tune the AI.
AI General Parameter Explanation
Training Secs: Controls the amount of time the AI trains for. The default is 300 seconds but can be modified per user discretion.
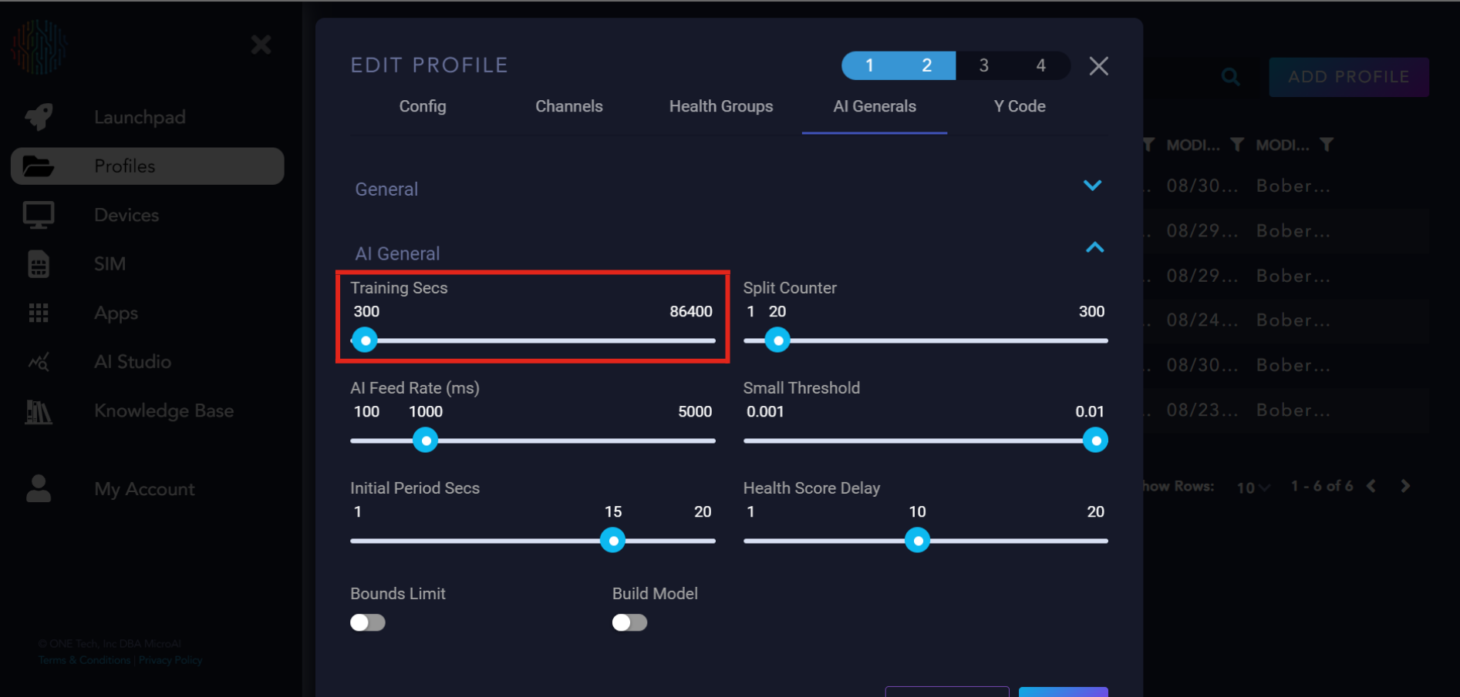
Split Counter: Referred to as the period of the device’s behavior. It is recommended that Training Secs be 10 times longer than Split Counter for ideal training.
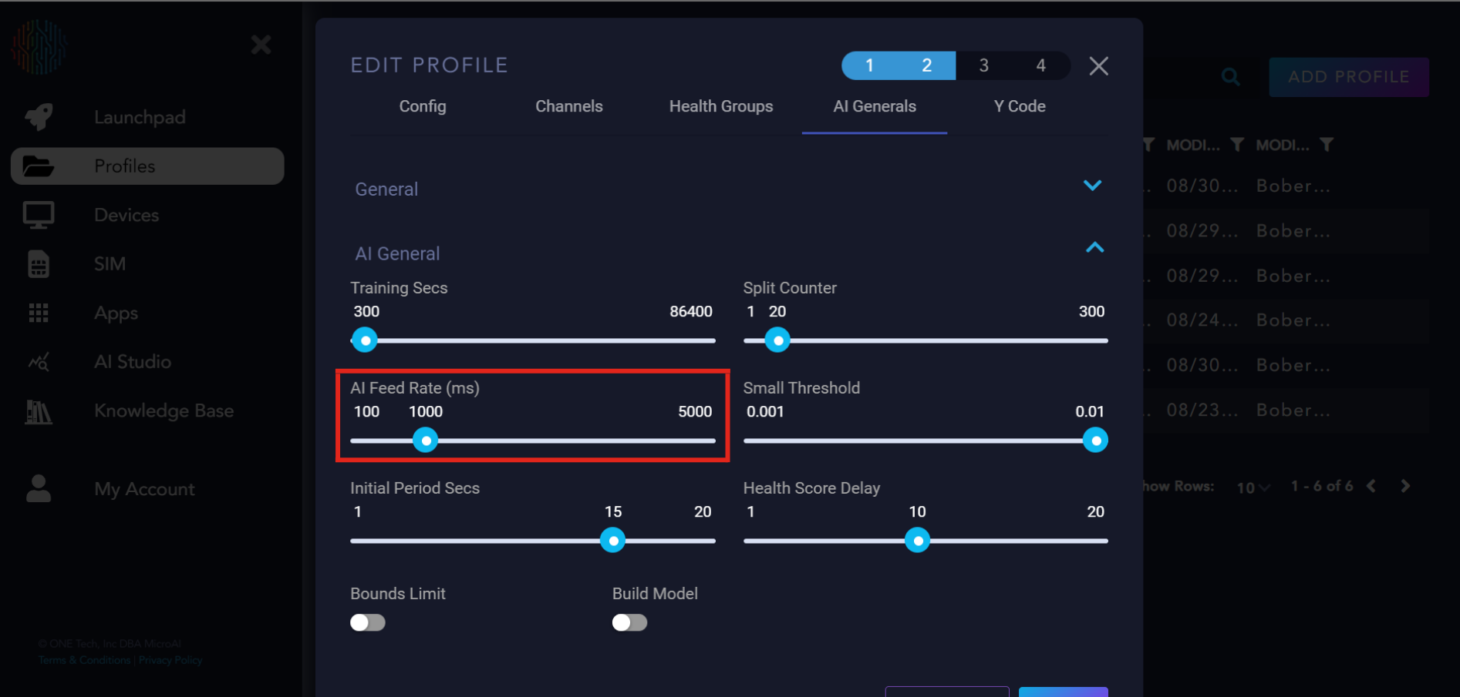
AI Feed Rate: The rate at which data is accepted by the AI. While 1000 milliseconds is recommended, it can be adjusted to meet specific needs.
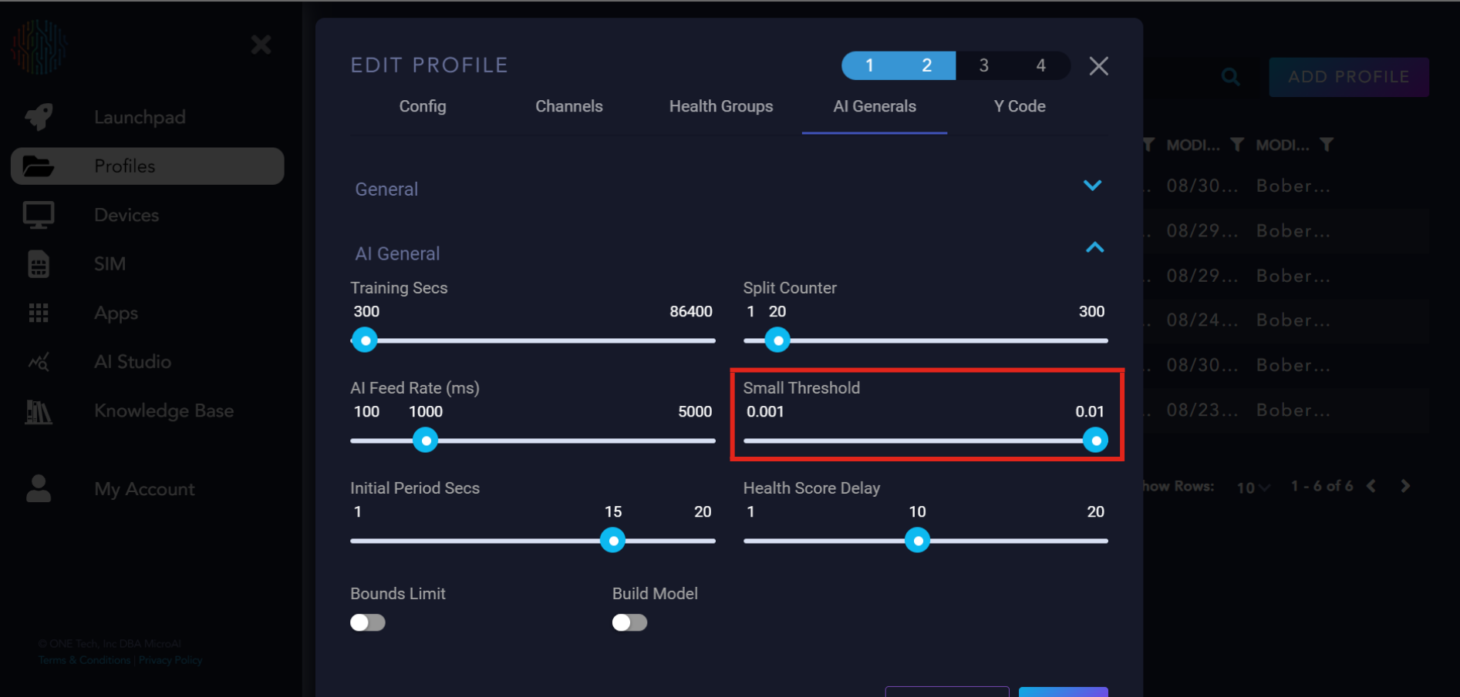
Small Threshold: Determines the minimum distance between the upper and lower bounds that they can converge.
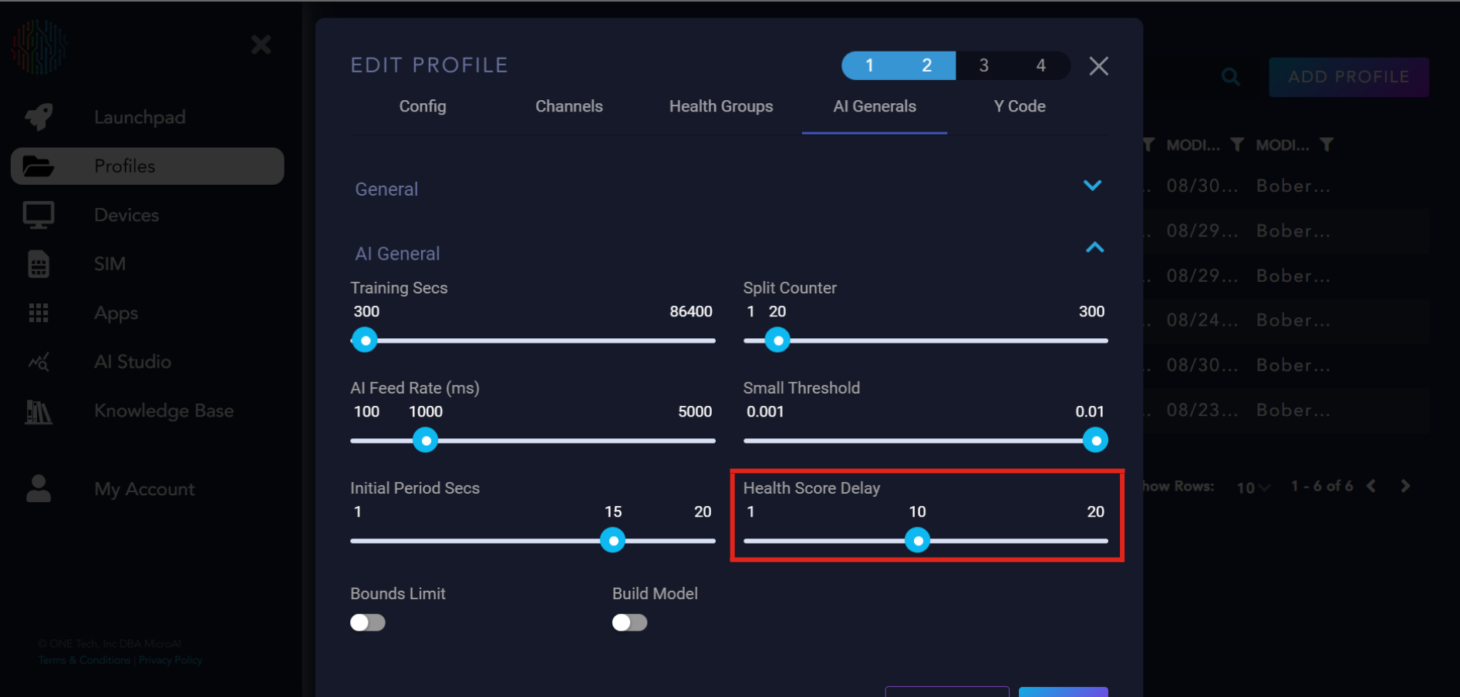
Initial Period Secs: The delay before AtomML™ starts sending data to the AI for training or execution.
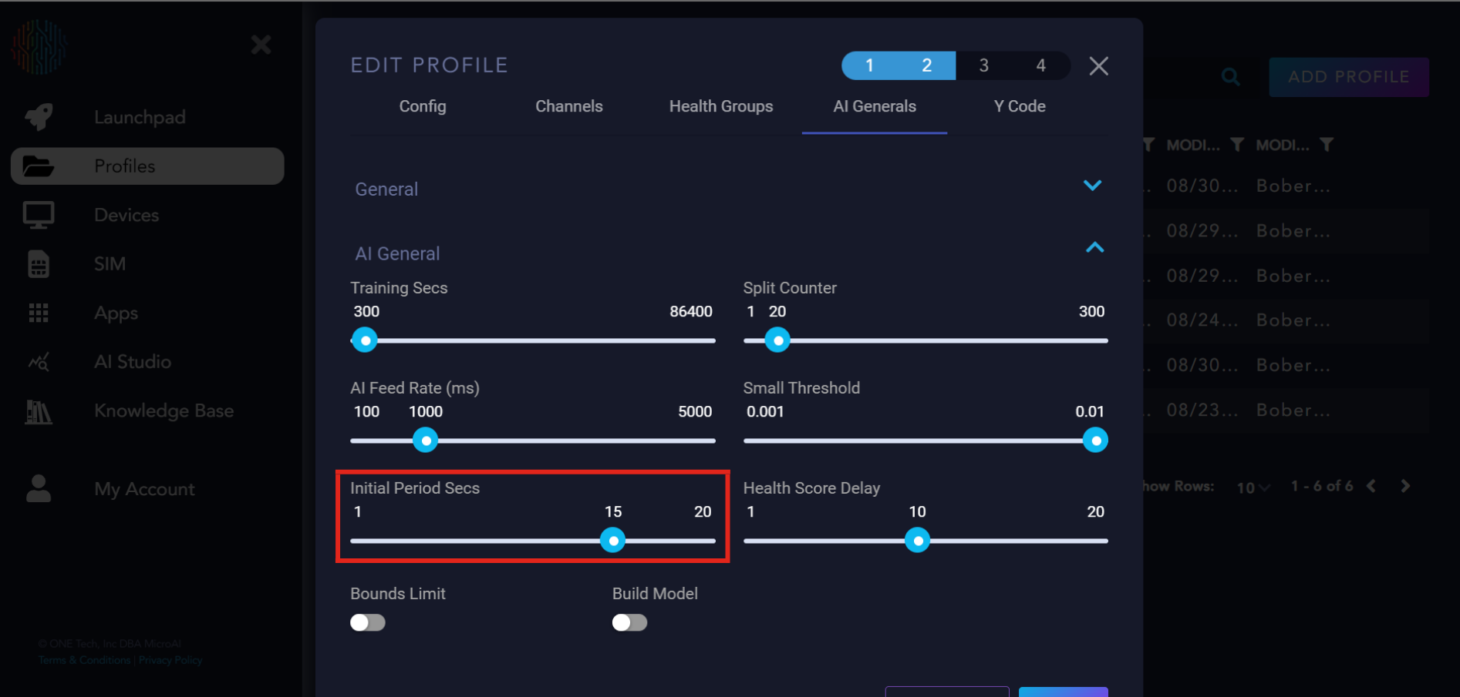
Health Score Delay: The delay in loops between the AI starting and the health score calculation.
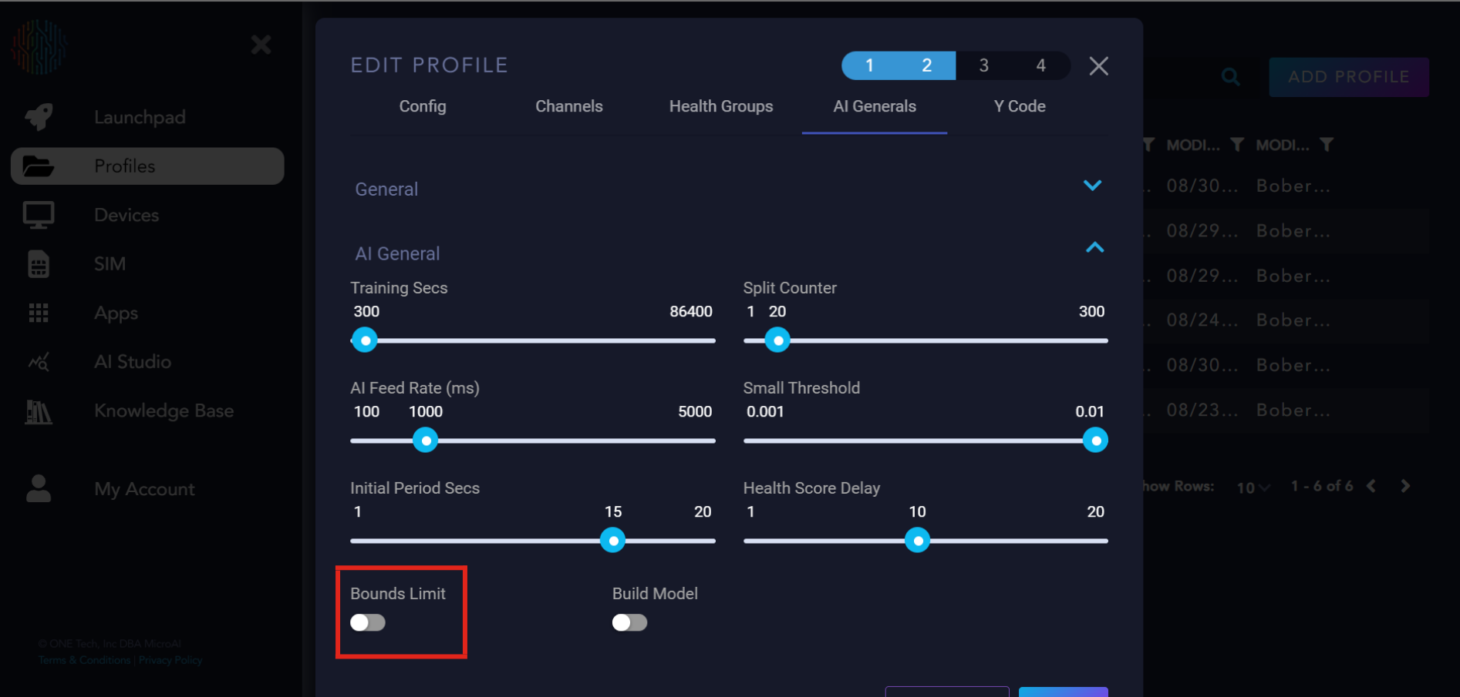
Bounds Limit: A flag for the AI on whether to calculate hard bounds for each channel.
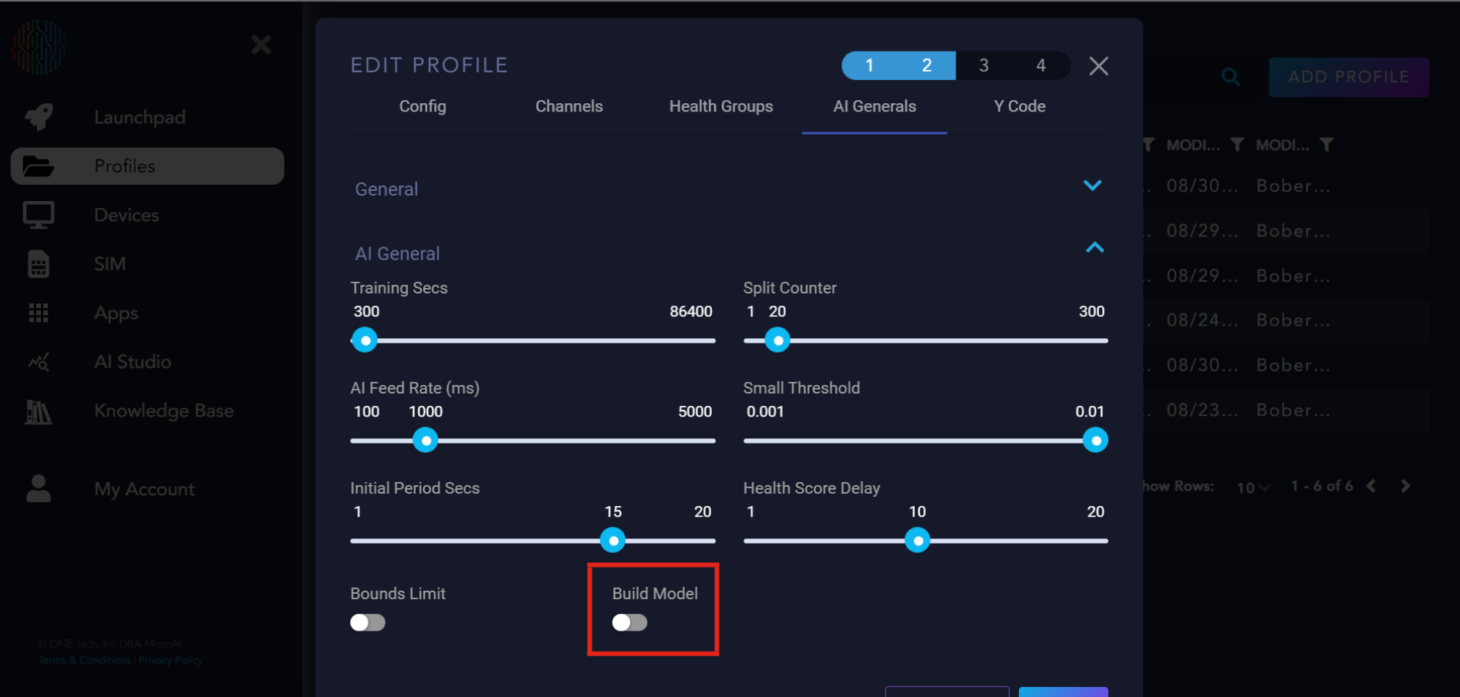
Build model: A flag to tell the AI to build the model or not.
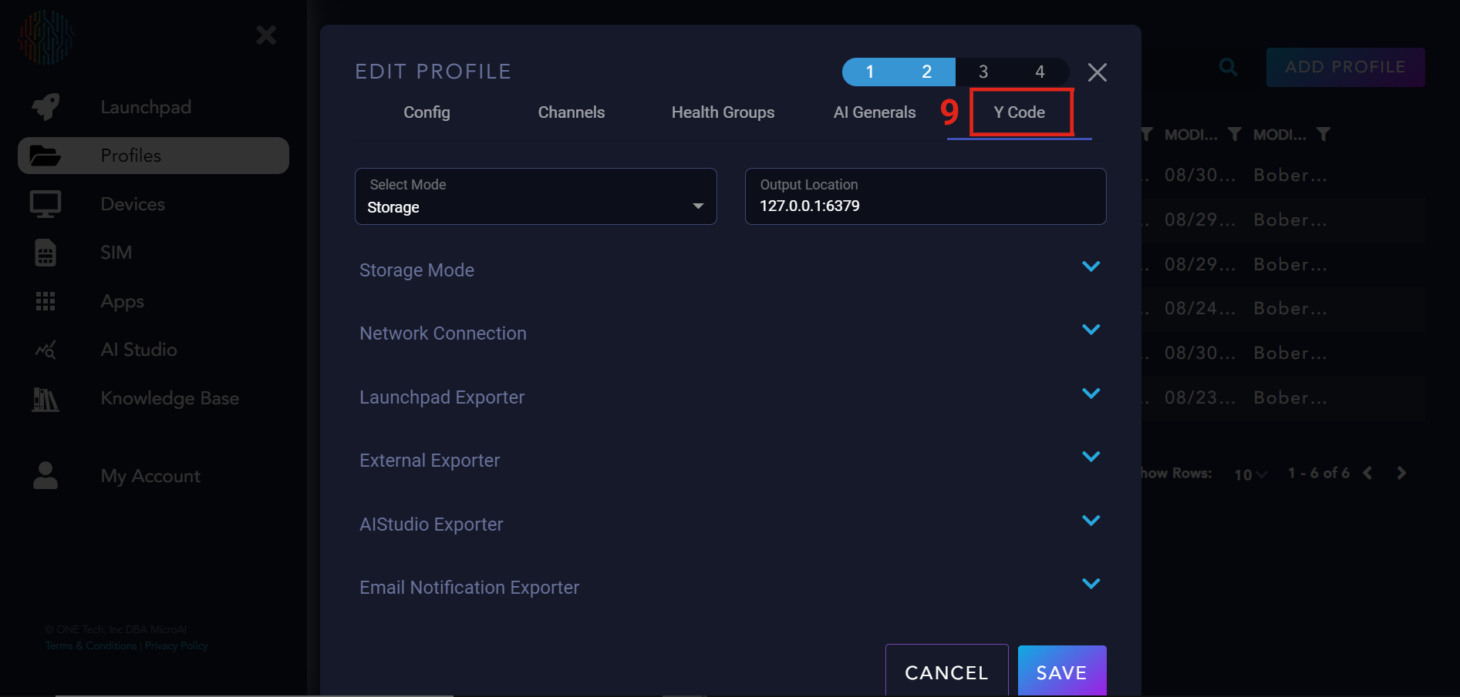
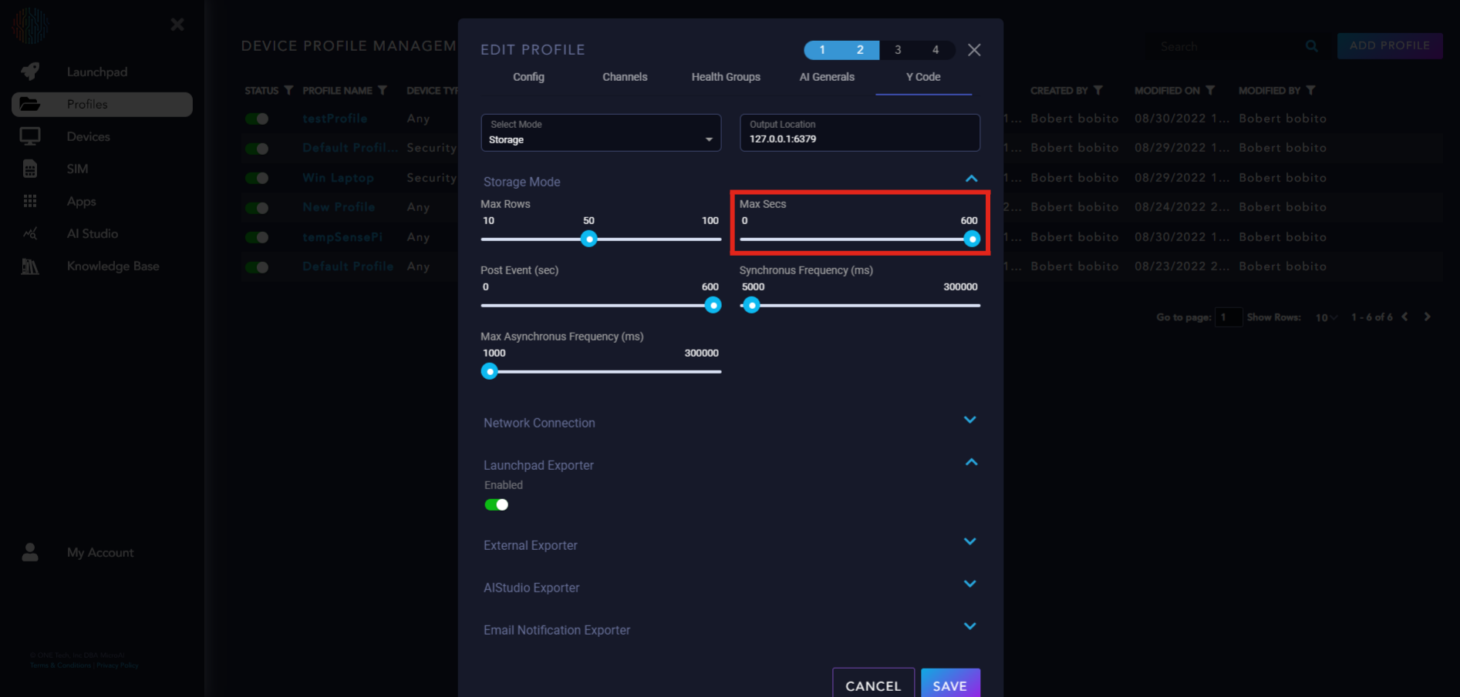
“Y Code”#
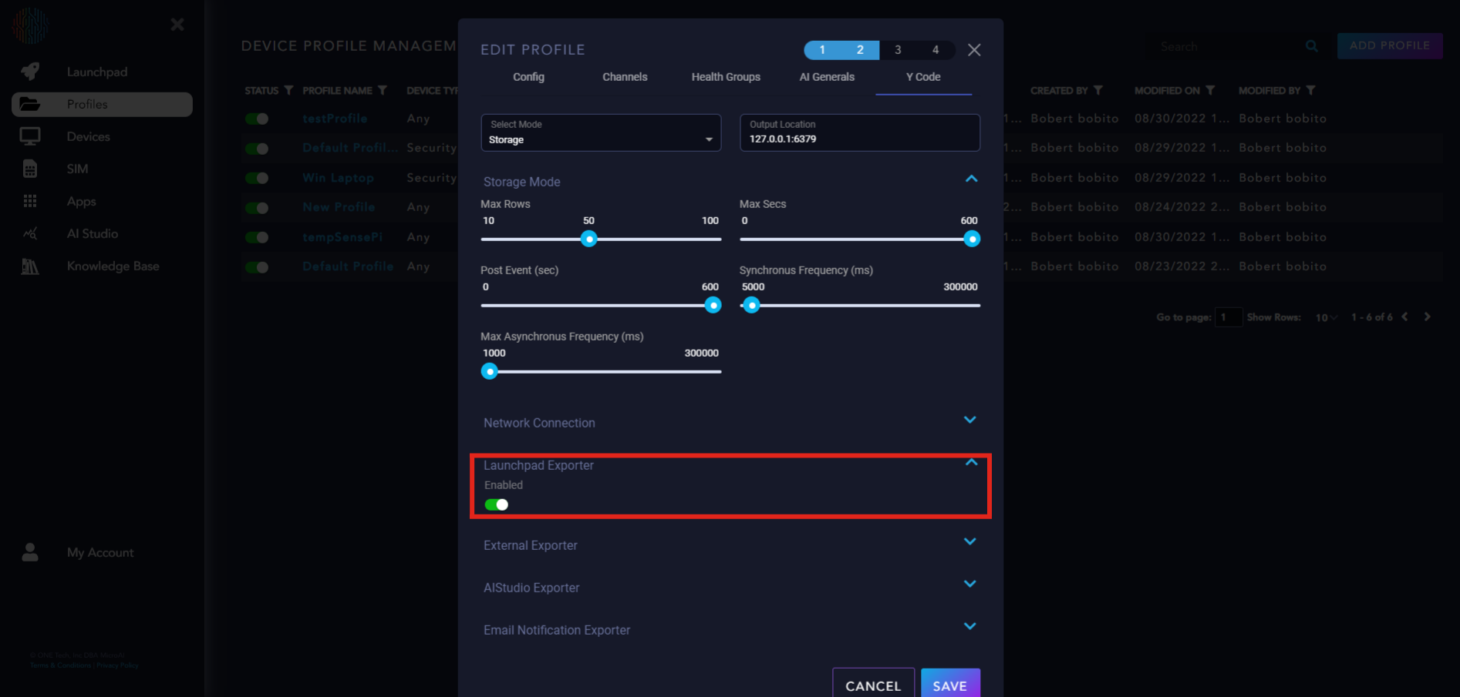
“Y Code” has two modes: “Storage” and “Continuous”. The “Continuous” mode continually sends data to Launchpad and is the default for AtomML™. “Storage” mode stores Asynchronous and Synchronous packets until a certain amount of time has passed or a certain amount of data has been collected, after which all data is sent at once.
Y Code Parameter Explanation
Max Rows: Sets the amount of data to be stored and sent when the trigger occurs.

Max Secs: Sets the time for data storage before triggering a send event.
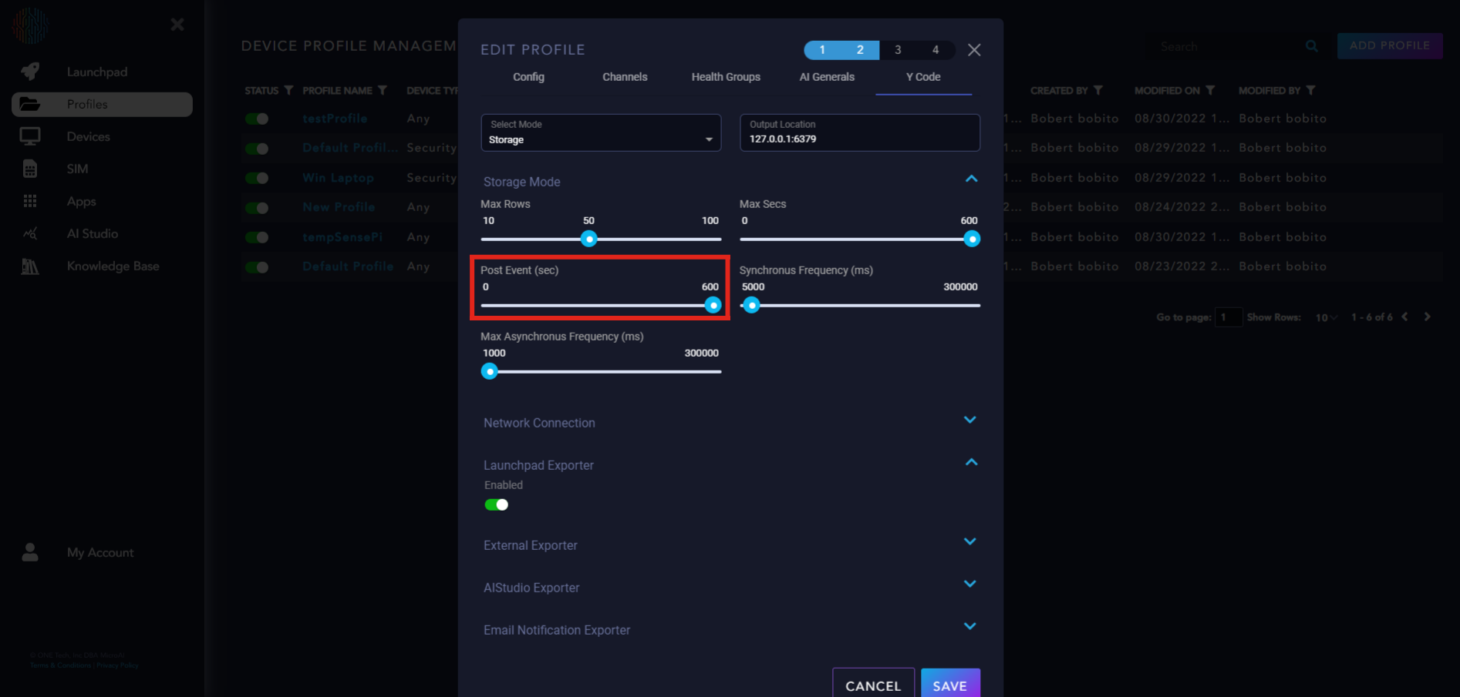
Post Event: The time to operate in continuous mode after the trigger event, to provide context before and after the event.
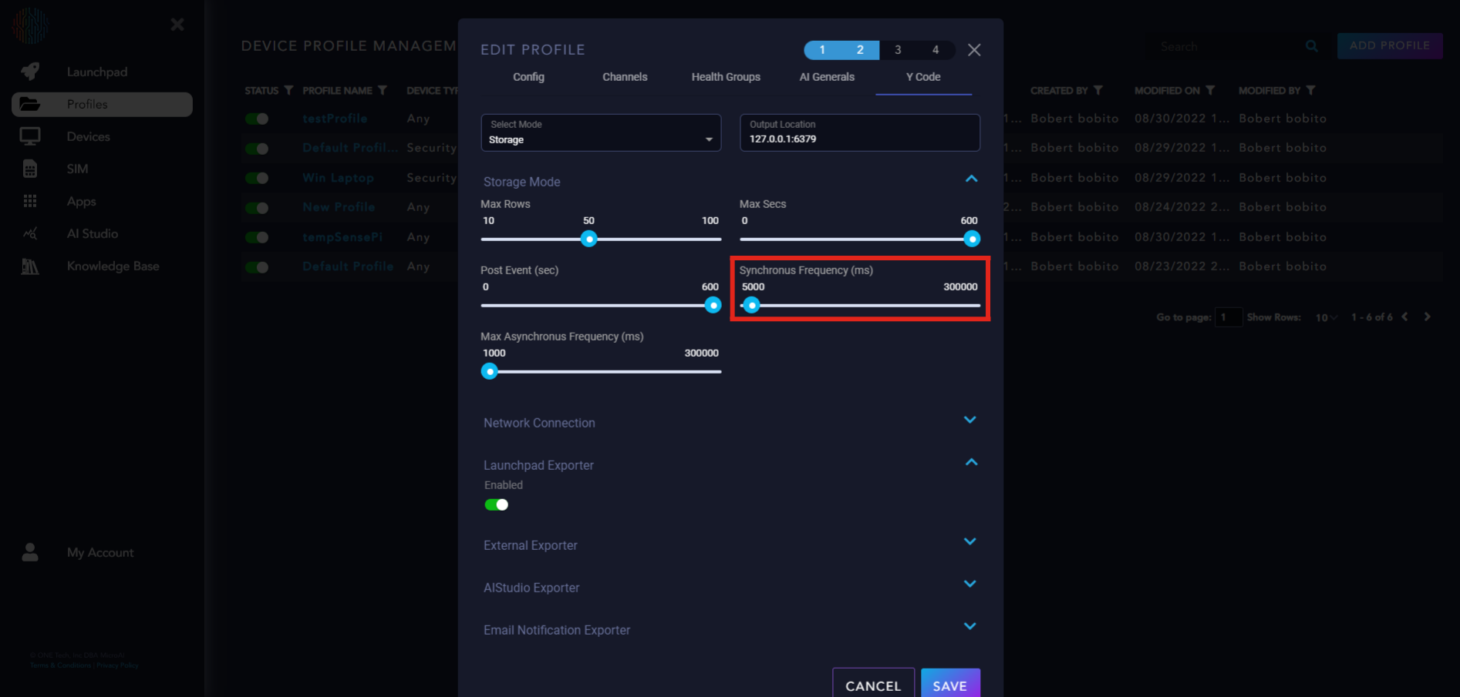
Synchronous Frequency (ms): The time period at which a synchronous packet is generated.
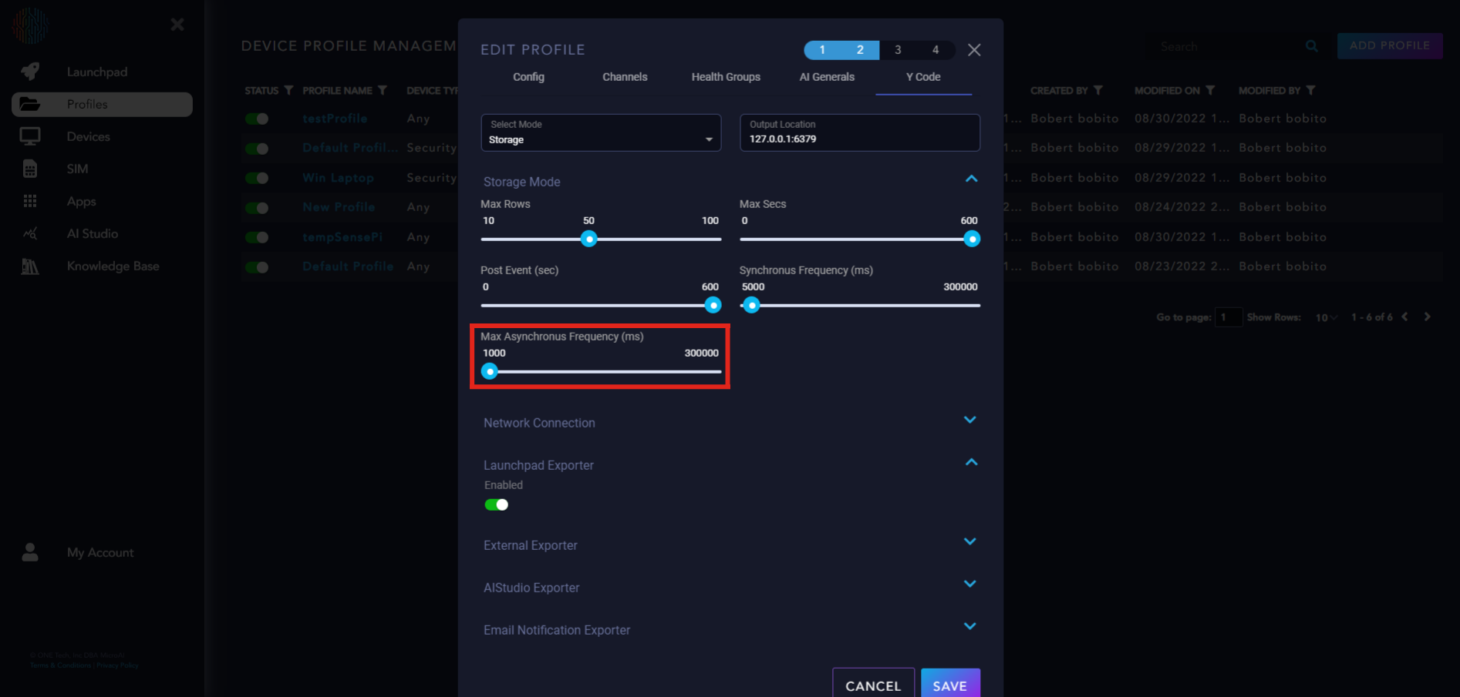
Max Asynchronous Frequency (ms): The time period for generating an asynchronous packet.
Launchpad Exporter: Enabled to send data to Launchpad.
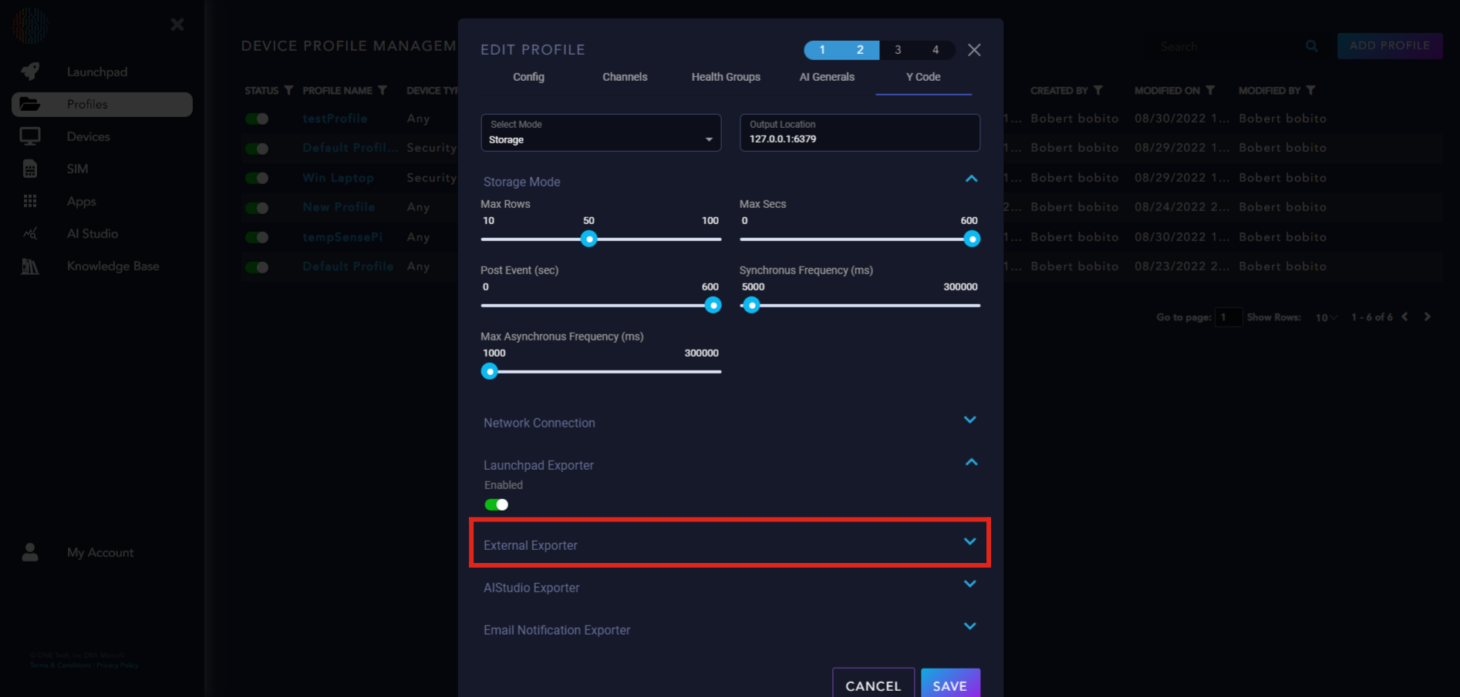
External Exporter: Applicable to specific use cases only.
AIStudio Exporter: An upcoming feature for Launchpad, to be explained in another section.
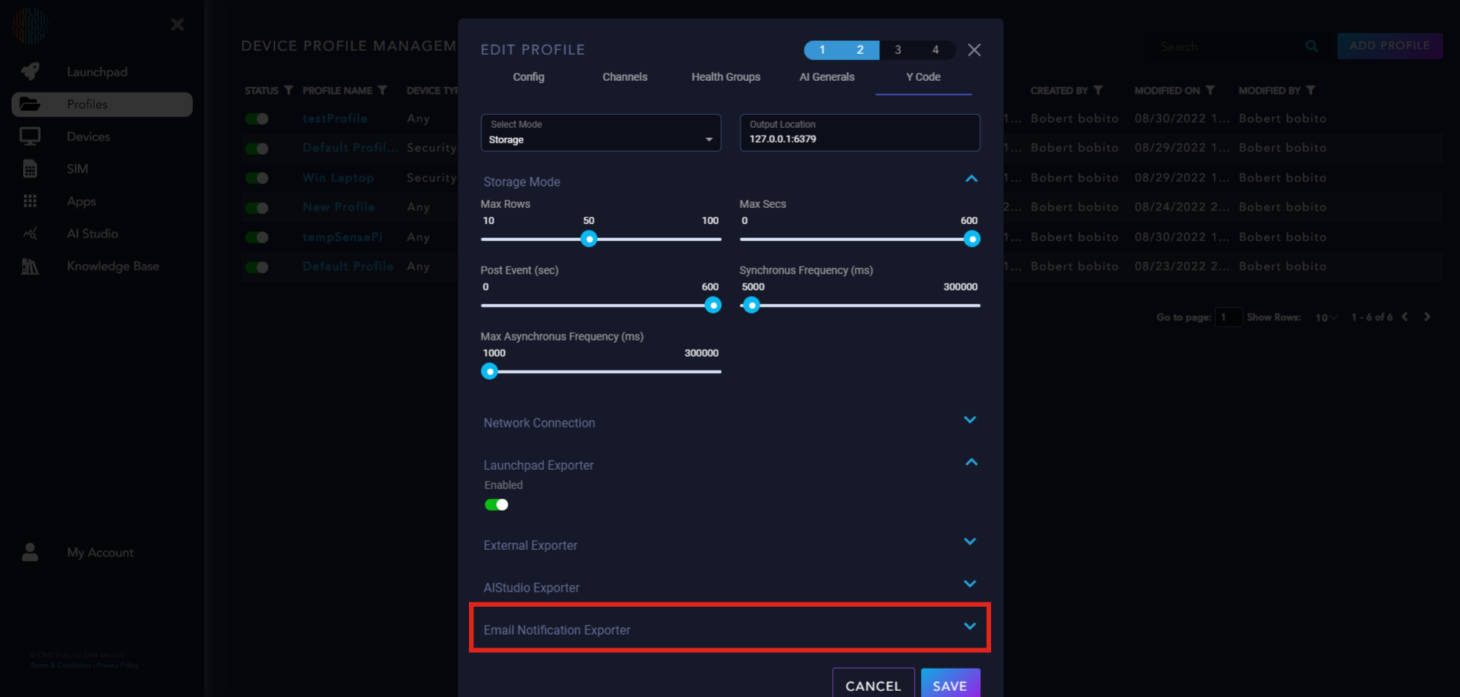
Email Notification Exporter: For setting up email notifications for your device.
How to for STWIN#
Setting up the STWIN for Asset Performance Monitoring involves several steps with specific configurations. Multiple MCU boards are supported by MicroAI, with software development kits available for download.
Note
This section will be expanded to provide detailed instructions on running MicroAI AtomML™ on the STWIN.
Requirements#
The following items are required to set up the STWIN for Asset Performance Monitoring:
A STM32L4R9 Board (STWIN)
Two micro-USB cables
A micro-SD card
A SD to micro-SD card adapter
A STLINK debug adapter board with ribbon cable
A 2.4GHz Wi-Fi network
A Wi-Fi expansion module compatible with the STWIN
A terminal emulation software (Tera Term is recommended)
STM32CubeProgrammer, this is used to flash files to the STWIN memory.
STWIN Assembly#
To assemble the MicroAI AtomML™ Kit:
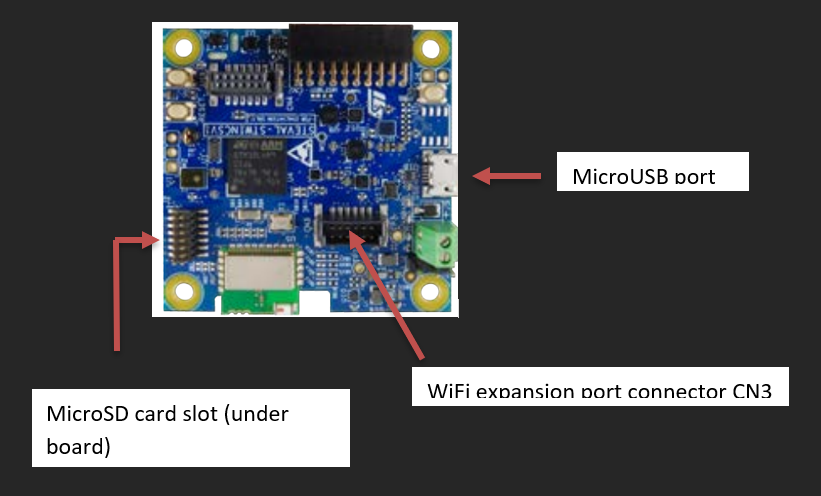
Connect the Wi-Fi expansion module by inserting the black connector on the module into the CN3 connector on the STWIN.
Connect a Micro-USB cable to the STLINK debug adapter board and a computer.
Connect the ribbon cable to the debug adapter board and the STWIN.
Connect the other Micro-USB cable to the STWIN and a computer.
Open Tera Term.
Establish a connection to the STWIN using the serial port.
To establish a serial connection using Tera Term:
Go to Setup > Serial Port.
Set Speed to 115200.
Set Port to the COM port the STWIN is recognized on.
Select ‘New’ to open the connection.
Locate the device MAC address; this will be used in the configuration file.

Register STWIN as a Device#
Create a device profile by clicking the “ADD PROFILE” button. Select Asset Performance Monitoring for the use case, ATOM ML for the technology, and STMicroelectronics STWIN for the device type. The screen should look like the image below.
Note
The STWIN has sensors built into the board, so it will have multiple channels already predefined in Launchpad.
Click “Next”, navigate to the Y Code tab, and expand the Network Connection section.
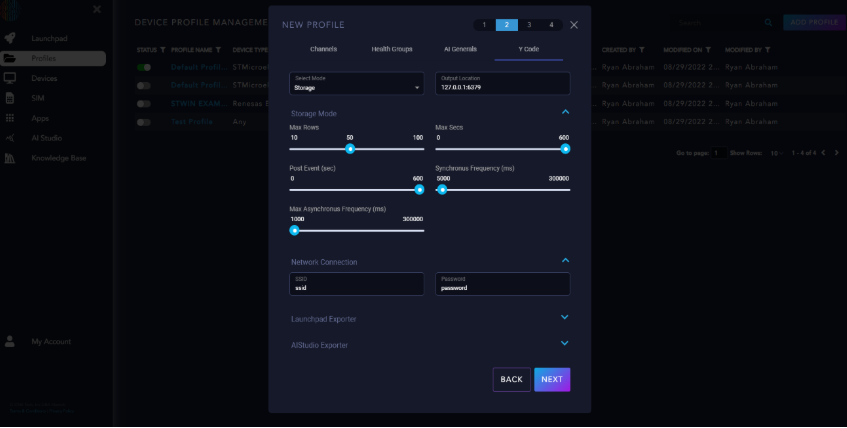
Fill in the Wi-Fi network information in the SSID and Password fields. Click “Next” to navigate to the plan section, and click “Next” again to enter profile payment information.
Click “Finish” to complete the creation of the profile. The link to download the files needed to run AtomML™ on the STWIN will be displayed.
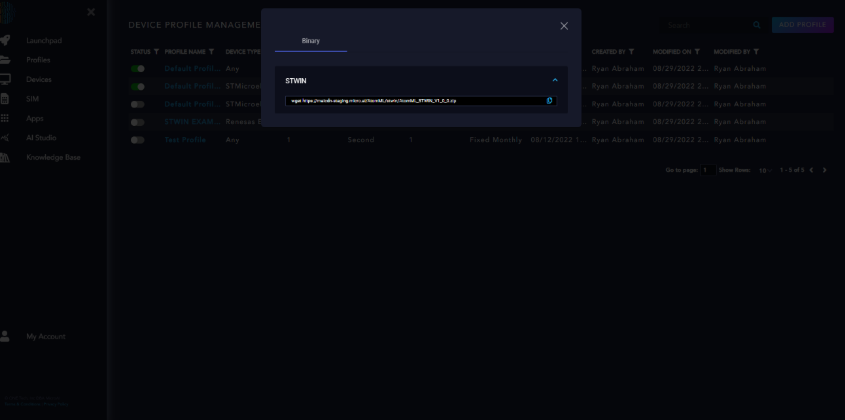
Copy the web address provided (excluding “wget”) and paste it into your browser to download the zip file containing the code to run on the STWIN and the configuration file for the micro-SD card. Unzip this file and save it for later.
Return to the home page.
Register the device by clicking the “Register a Device” tile, ensuring the device is registered under the newly created device profile using the MAC address from Tera Term.
Click “Save” to finish registering the device.
Installing the Configuration File#
In the downloaded zip file, open the “config.jsn” from the “sdcard” folder and input the MAC address obtained earlier.
Insert the SD card into the host machine (your main computer).
Open the downloaded zip file.
Move the “sdcard” folder to the SD card.
Eject the SD card and install it in the STWIN.
Flash AtomML™ to STWIN#
Open STM32CubeProgrammer.
Click the tab next to the Device memory tab and select “Open file”.
Note
Select the binary file from the “bin” folder within the unzipped Launchpad download.
Change the USB dropdown on the top right to STLINK and connect to the debugger.
Click “Download” to flash the program file to the STWIN’s internal memory.
Disconnect the debugger from the STWIN board before physically disconnecting it.
Note
AtomML™ is now running on your STWIN device. You can view the device’s dashboard by going to the Launchpad website and selecting your device.